If you’re stuck at home due to a flu, bad weather, or just a lack of funds, it can be hard to find photographic inspiration. In this guide, I’m going to show you some photography projects you can try out at home, mostly with materials and equipment you’ll already own. Trying out new techniques is a great way to get out of a creative rut, or simply fit something you enjoy into a busy life.
Here’s what we’ll cover:
- Smoke art
- Water droplets
- Light spirals
- Flowers in ice
- Intentional Camera Movement
- Pinhole photography
Smoke art
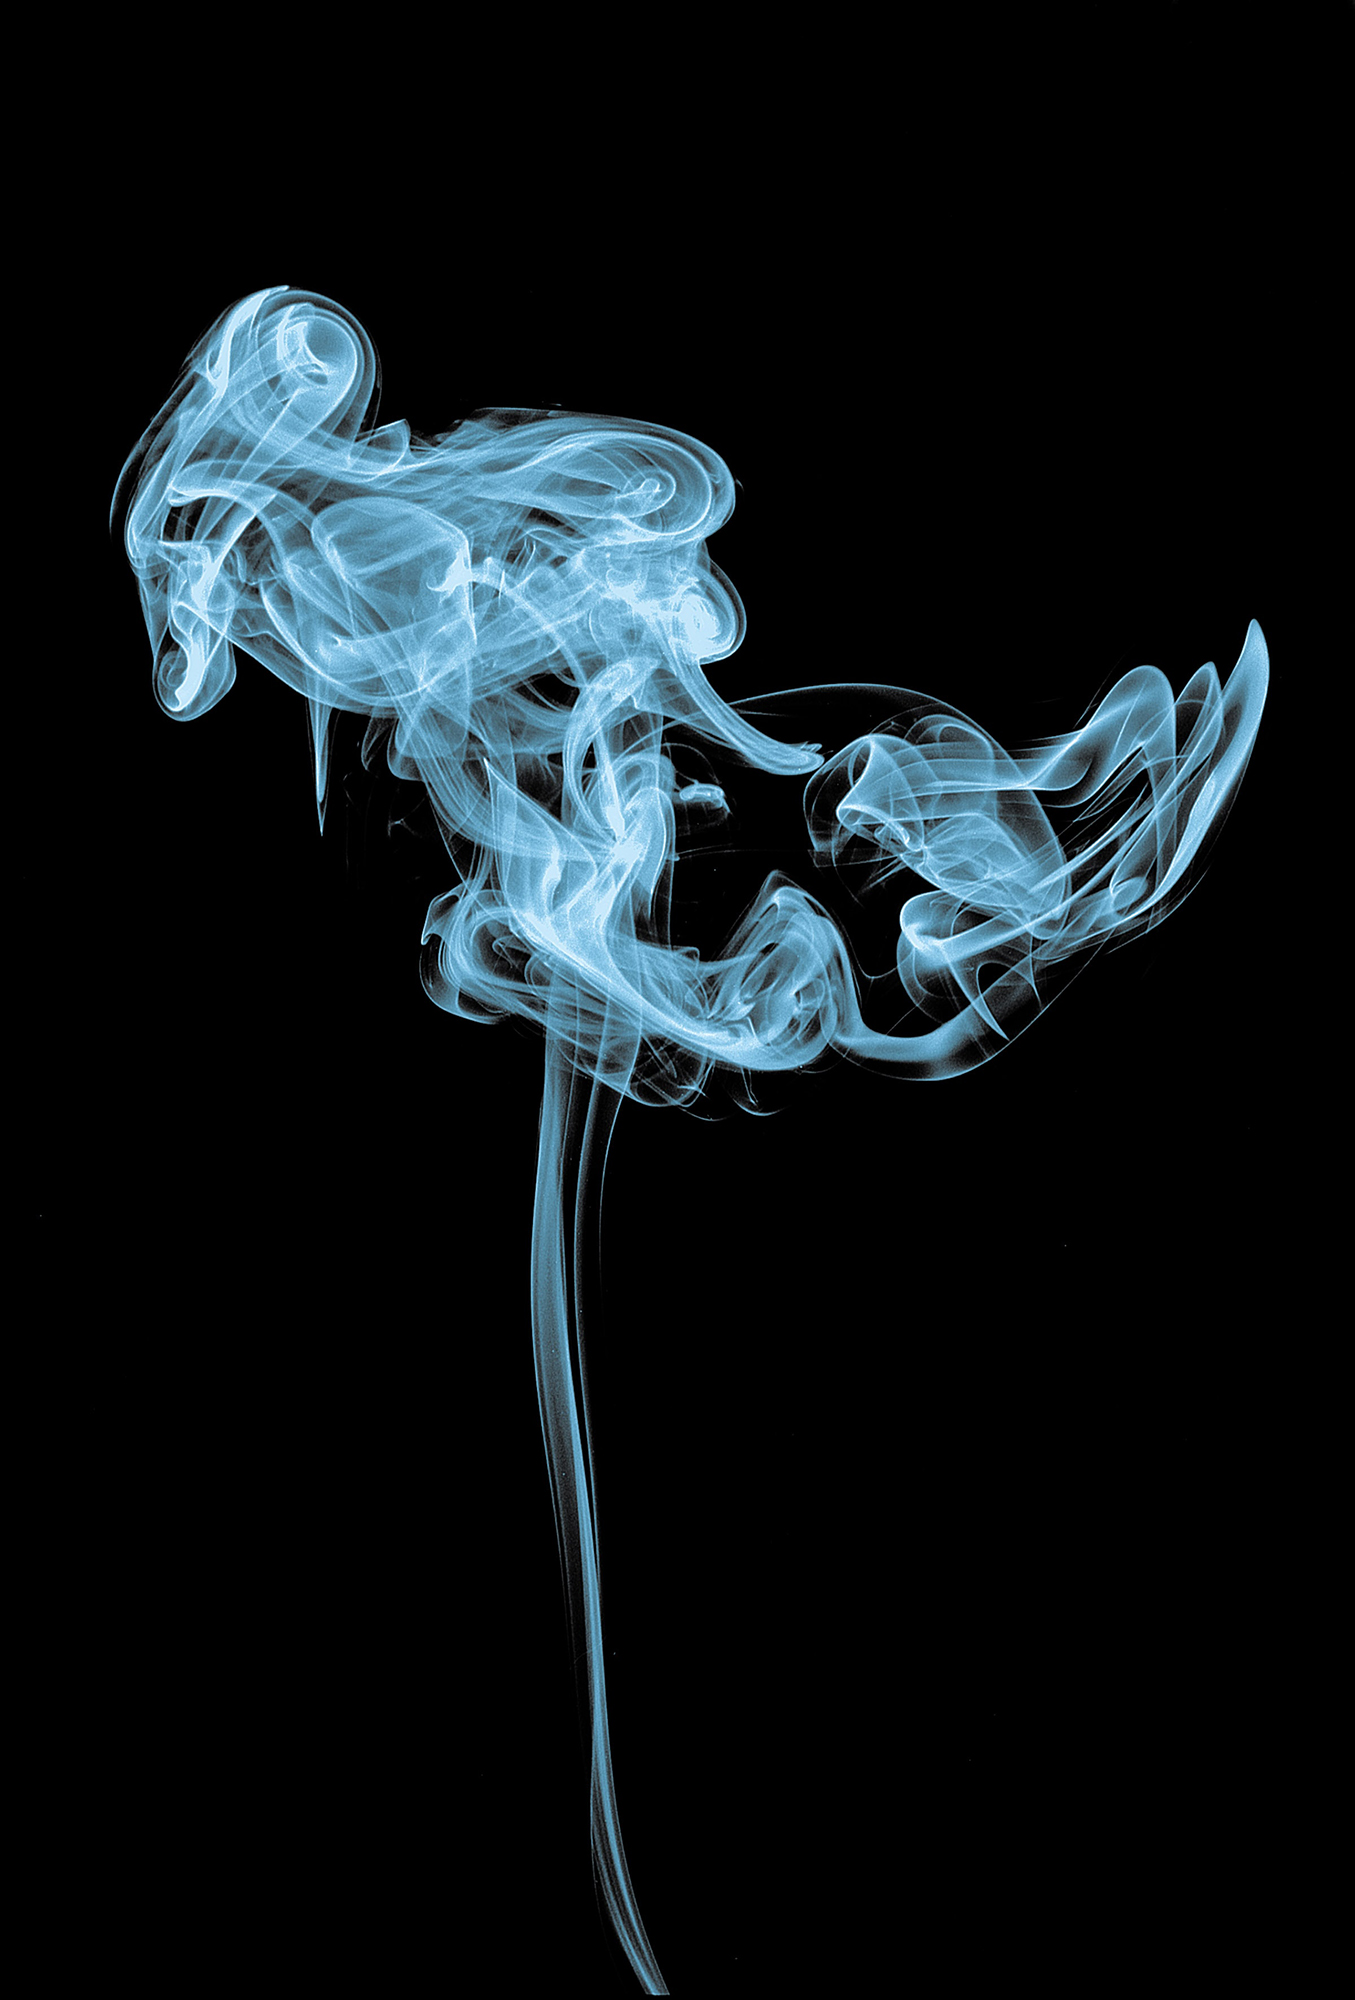
Photo by Stephen Hocking | Combining images in Photoshop can allow you to create distinct and beautiful shapes with your smoke art
Don’t worry, you don’t need a 20 a day habit to create beautiful images with smoke! A pack of incense and a dark background will do the job just as nicely. Set your incense stick alight in front of your background and use an off-camera flashgun to illuminate the scene. Make sure the flashgun is off to one side and that it doesn’t spill onto the backdrop or lens. Focus on the tip of the incense stick and then switch over to manual focus to lock in the focus distance.
Start with a fast shutter speed of around 1/250th to freeze the smoke and an aperture of f8. This will keep the smoke in focus whilst keeping the background slightly soft. Take a few test shots and adjust the power of your flash to get the smoke correctly exposed to your liking.
Key Lesson: You can take this project a step further by manipulating the smoke in Photoshop. Open a blank document and copy and paste your smoke image into it. Change the blending mode to Screen and then use Warp Transform to reshape the smoke. You can combine a number of smoke shots to get more defined and recognisable shapes.
Water droplets
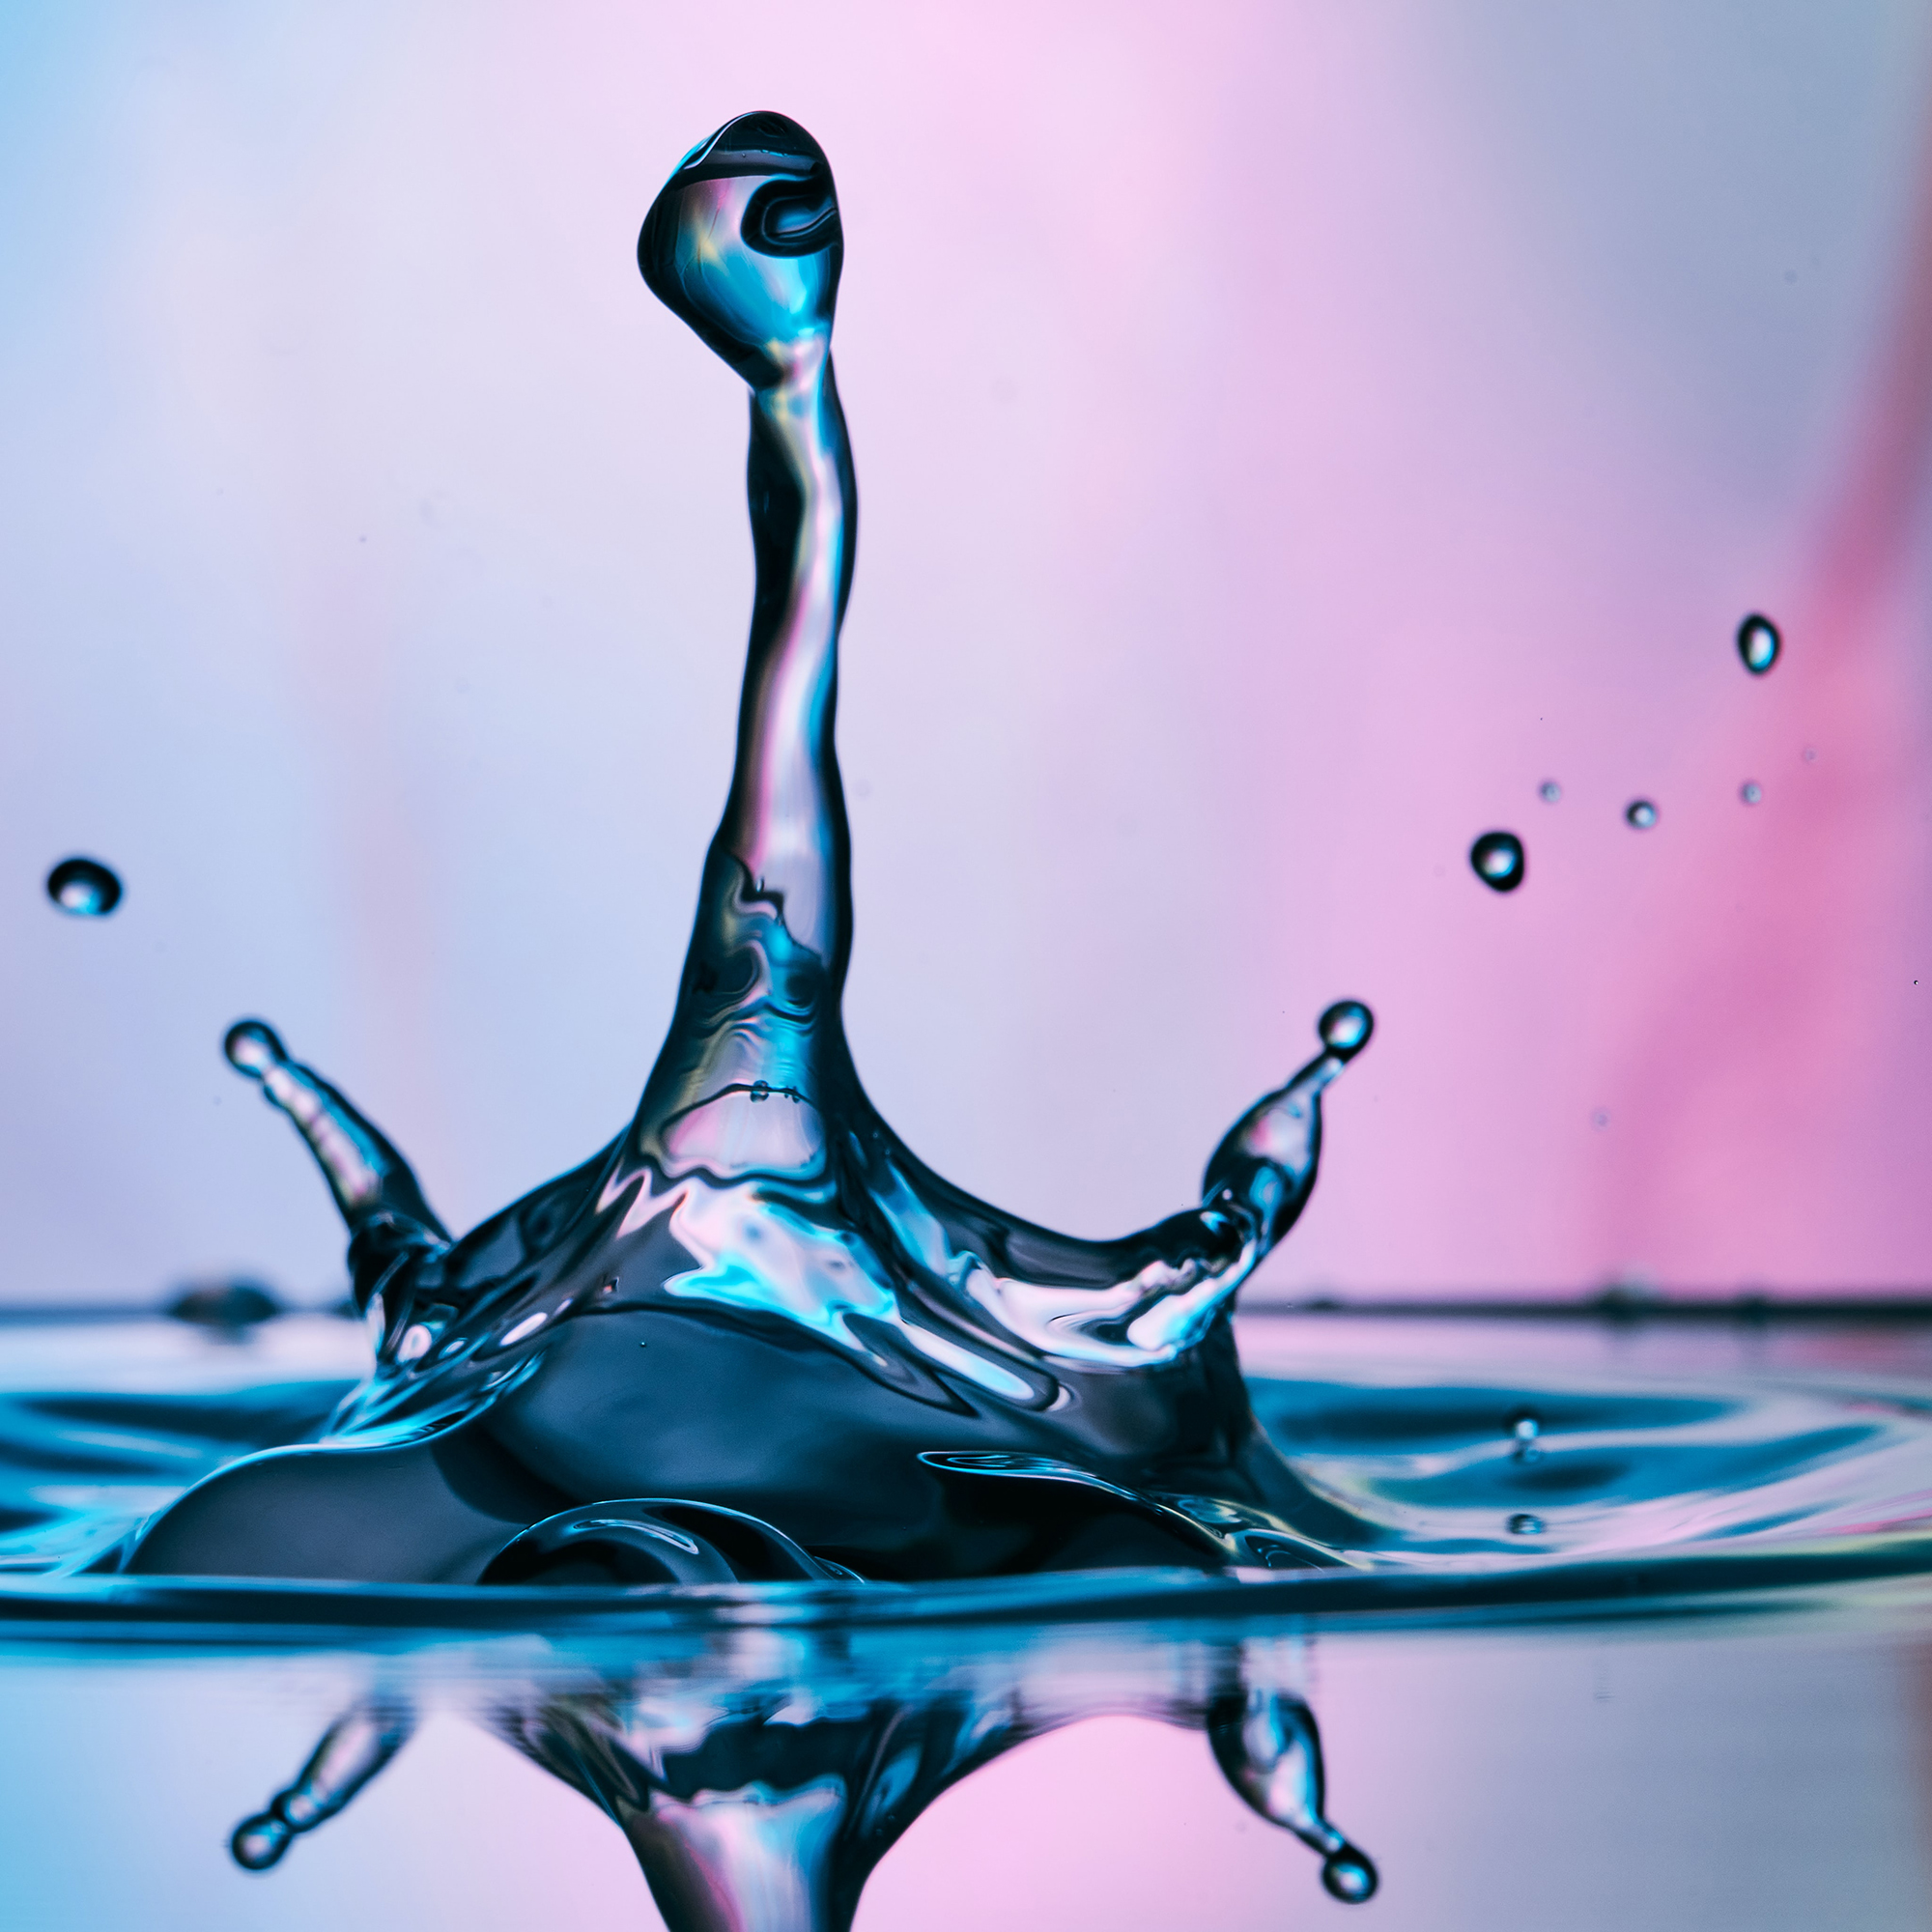
Photo by Martin Brechtl | A coloured background adds interest and vibrancy to water droplet image
For this project, you need to suspend a container of liquid and let drops fall through a small hole to capture the resulting splash. A brightly coloured dish or glass dish with a piece of coloured paper behind it will add vibrancy and interest to your shot. Before you fill your dish with water make sure it’s completely clear of dust and hairs as these will show up in your shot. You can control the shape of your water droplets by varying the water depth in your dish – shallow for crown-shaped splashes and deeper for taller columns. The easiest way to create a droplet is to use a pipette – you can either ask a friend to squeeze it for you or do it yourself and fire your camera remotely.

A tripod is essential for water droplet photography as it makes sure your droplet is always in the frame and in focus. Try and get your droplet near the centre of the frame and include space around it to capture the whole splash. You can always crop the image later.
Focus on the point where your drops will hit the water (dip your finger in the water to give you something to focus on). Use a fast shutter speed of around 1/250th and an aperture of f5 to give you a smaller depth of field that focuses in on your droplet. You’ll also need a flashgun to illuminate the scene.
Light spirals

Photo by FLY:D | Coloured gels or even sweets and candy wrappers can transform light spiral shots into exciting images
A great way to produce interesting abstract work is to try light spirals. Attach a torch, suspended by string, to an open area of the ceiling. Using the widest lens you can mount your camera to a tripod and point it straight up at the ceiling. Make sure you set your focus on the tip of your torch and either lock it in or switch to manual focus so that the lens doesn’t try to refocus during your shot.
Set your aperture to f16 to give a large depth of field and change your shutter speed to Bulb mode so that you can control the length of time your shutter is open for. You will probably need an exposure of between 30 seconds and a minute. To avoid camera shake, use a remote release. Once you’re ready, turn off the lights and start the torch spinning to create abstract spirals with your light. If you want to get multiple exposures in one shot, you can cover the lens with a black card in-between torch swings. You can also change the torch colour by placing coloured gels over the bulbs. If you haven’t got colour gels, then you can achieve different colours using sweets and candy wrappers!
Flowers in ice
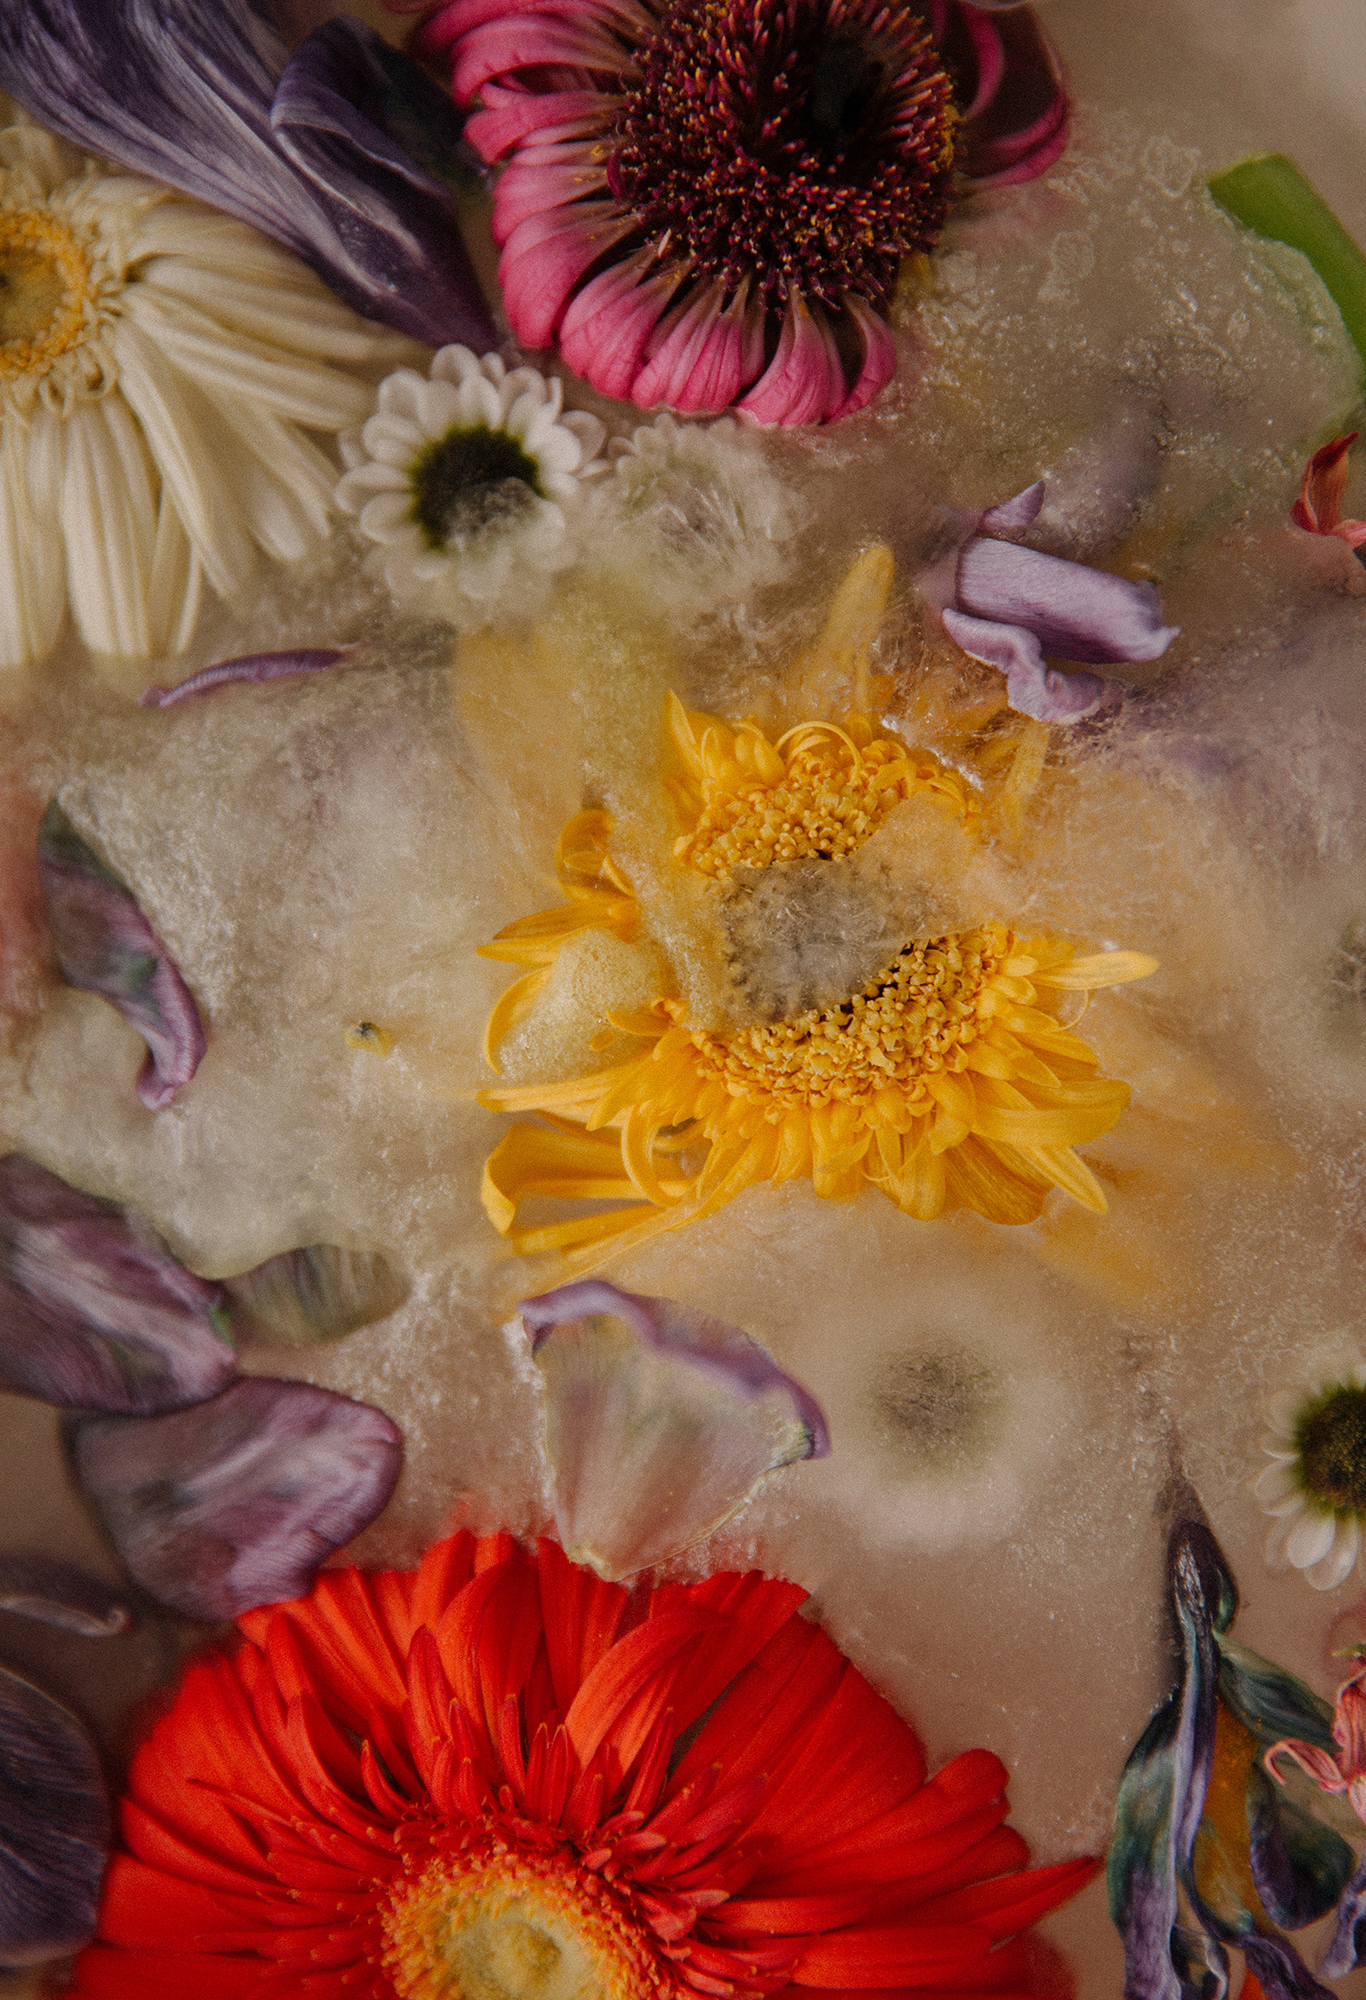
Photo by Tamara Schipchinskaya | As you grow more confident with flowers in ice, you can add multiple flowers to create a layered effect
This technique can produce beautiful photographs that will make great wall art images that you could easily sell or display in your home. Firstly you will need to freeze your flowers. Ideally, you’ll want to use distilled water, as it will freeze clear. You can obviously use regular water, but it will probably freeze slightly cloudy. Flowers will float, so you need to weigh them down or fasten them into place. Once your blocks of ice are ready, put them into a glass on top of a white plate so that light can bounce through from below.
Position a flashgun at one side and shoot from the other side. You’ll need a cable to attach your camera to the flash. Make sure you use a low ISO and a smaller depth of field to make the flower ‘pop’ out of the ice.
Intentional Camera Movement (ICM)

Photo by Kristin Charleton | ICM photography can be used in so many different photographic situations. Starting off with a simple left to right panning shot is an easy way to build up confidence
ICM is an abstract style of photography where you deliberately move the camera about during a long exposure. The end result shouldn’t be an out of focus blurry shot, but one that uses a soft focus to create an almost painterly feel to images. Start with a shutter speed of around 1/20th to allow you to move the camera around during your exposure. And make sure you use a low ISO of 100 or 200 to avoid any noise on your images. Whilst depth of field is largely irrelevant in shots where nothing is going to be conventionally sharp, a smaller aperture may help you to work with longer exposures in the daytime without risking overexposure.
Key Lesson: You can use several techniques to capture ICM images. Panning is a good technique to start out with as it just involves moving a tripod from side to side. You can pan horizontally or turn your camera to pan vertically. Once you’re comfortable with this, you can try other techniques such as rotating your camera to form a swirling pattern or use abstract curving movements to form your own patterns.
Pinhole photography
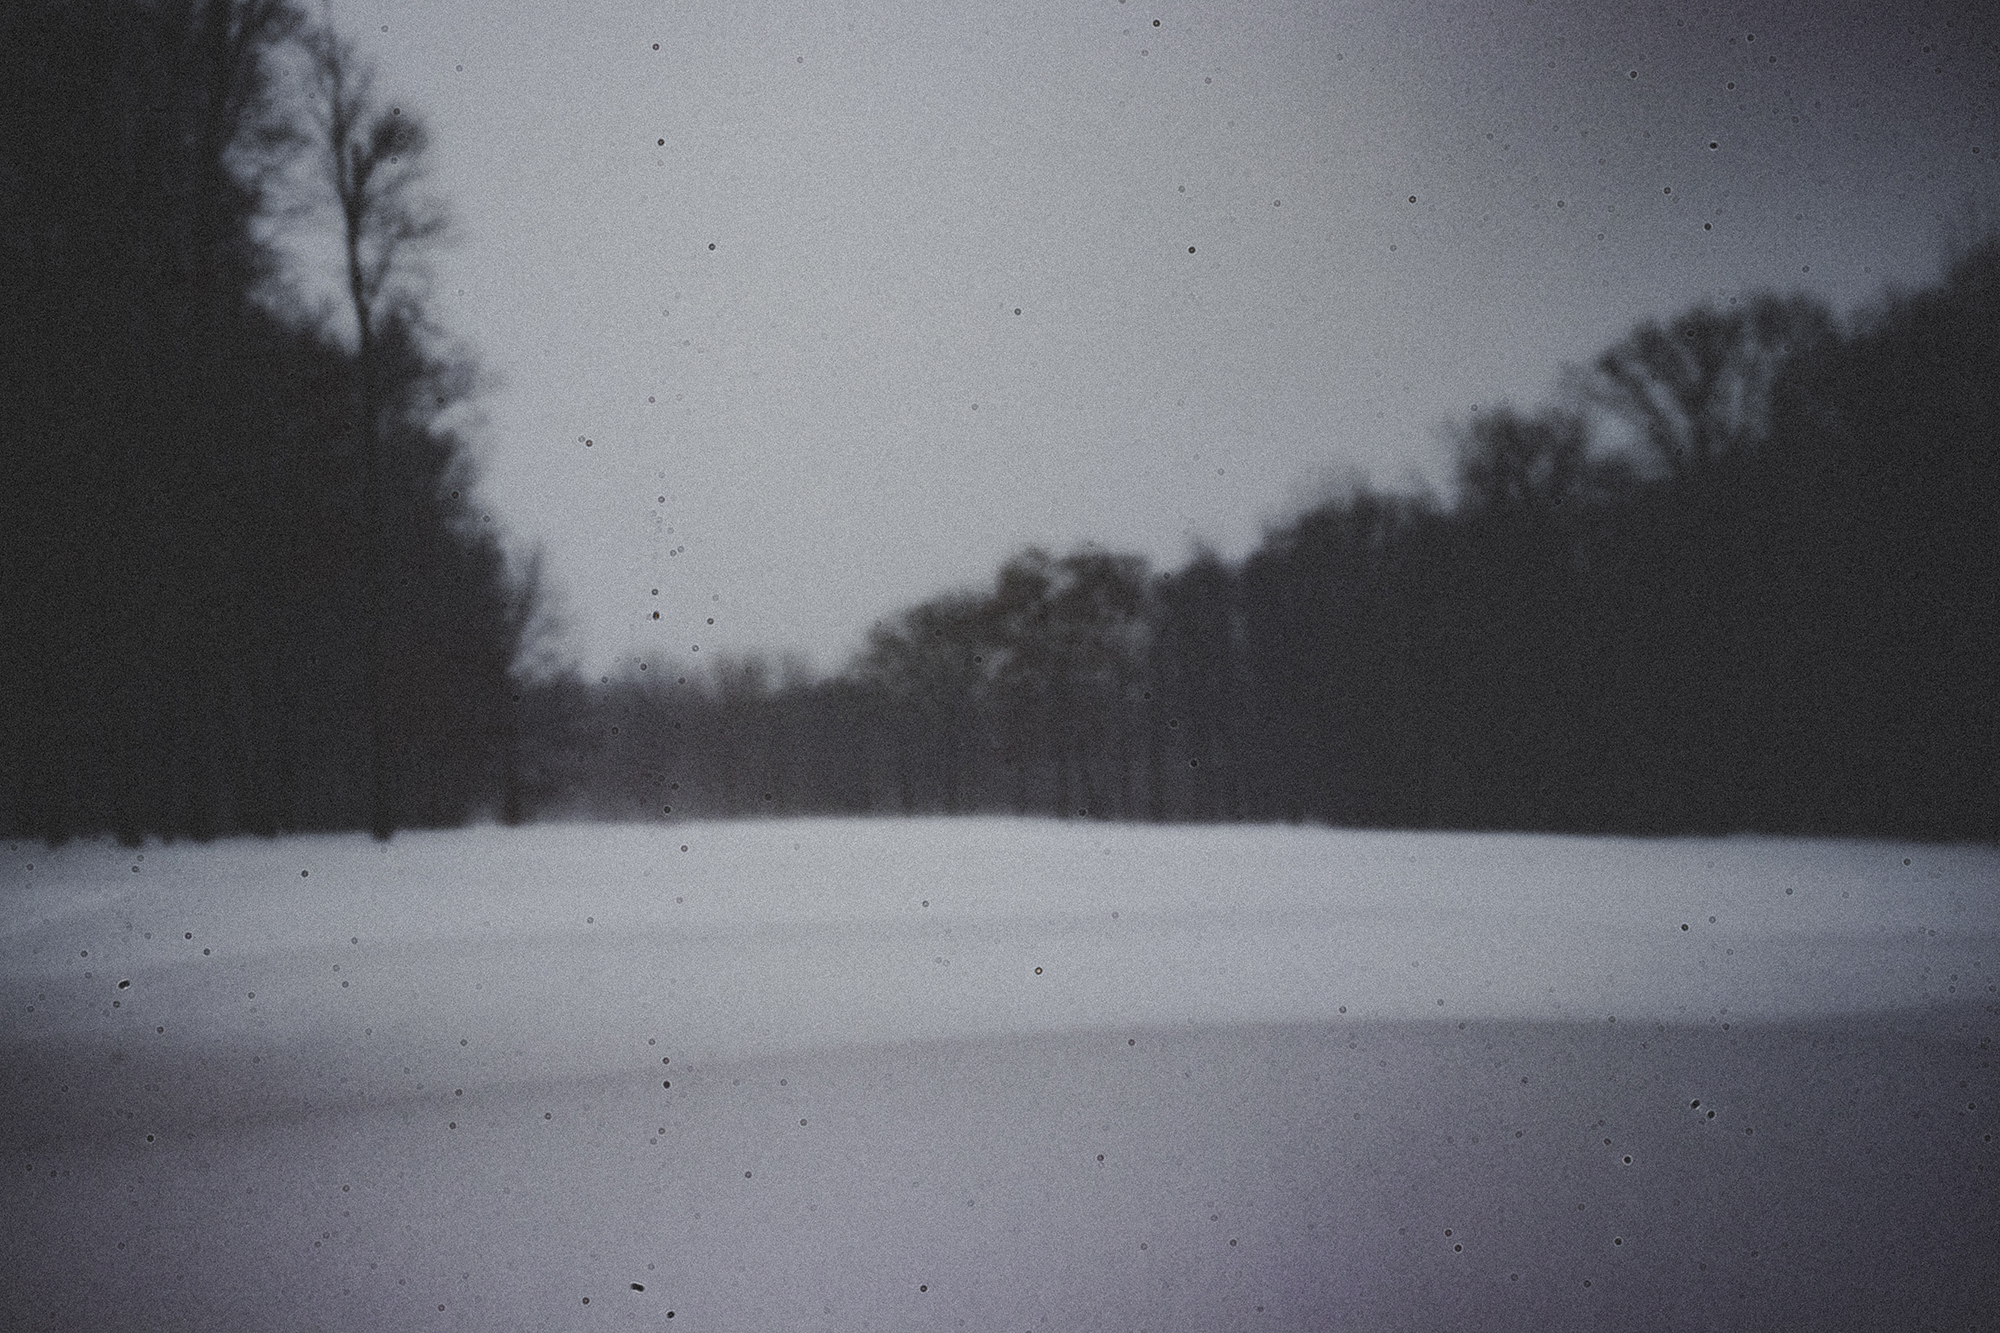
Photo by Joel Naren | Pinhole photography can produce very atmospheric images – it’s also an easy way to show up any dust on your sensor!
Pinhole photography has been around since the 5th century BC, with the very basic concept of light passing through a small hole in a lightproof box, creating an inverted image on the opposite side of said box. You can recreate the look of a pinhole camera quite simply by using your camera and a spare body cap. Pierce the smallest hole possible with either a needle or drill bit in your spare body cap – the optimum pinhole size is 0.3mm for a DSLR, which equates to an aperture of f150 at 45mm. Focus to infinity, set the ISO to 100, and experiment with shutter speeds from around 8 – 30 seconds to get the correct exposure (you’ll obviously need to use a tripod!).
In conclusion
These are just a few examples of the hundreds of DIY photography projects you can try out at home. As you can see, they really don’t require much beyond what you’ll already have in the house. Hopefully, the ideas I’ve given you here will help inspire you and get your creative juices flowing!
Self-help quiz
- What blending mode should you use in Photoshop when working with smoke images?
- What shape will water droplets form in a shallow bowl of water?
- What sort of water works best for flowers in ice images?
- What shutter speed should you start with when shooting ICM images?
- What is the optimum pinhole size for a DSLR?
Cover Photo by Tamara Schipchinskaya