Photographing newborn babies involves capturing images of babies sometimes as young as a couple of weeks old. It’s always going to be a popular genre of photography – people are always going to be having babies! In this guide, I’ll run you through everything you need to know about photographing newborns safely and successfully.
Here’s what we’ll cover:
- Equipment
- Props
- Camera settings
- Taking the photographs
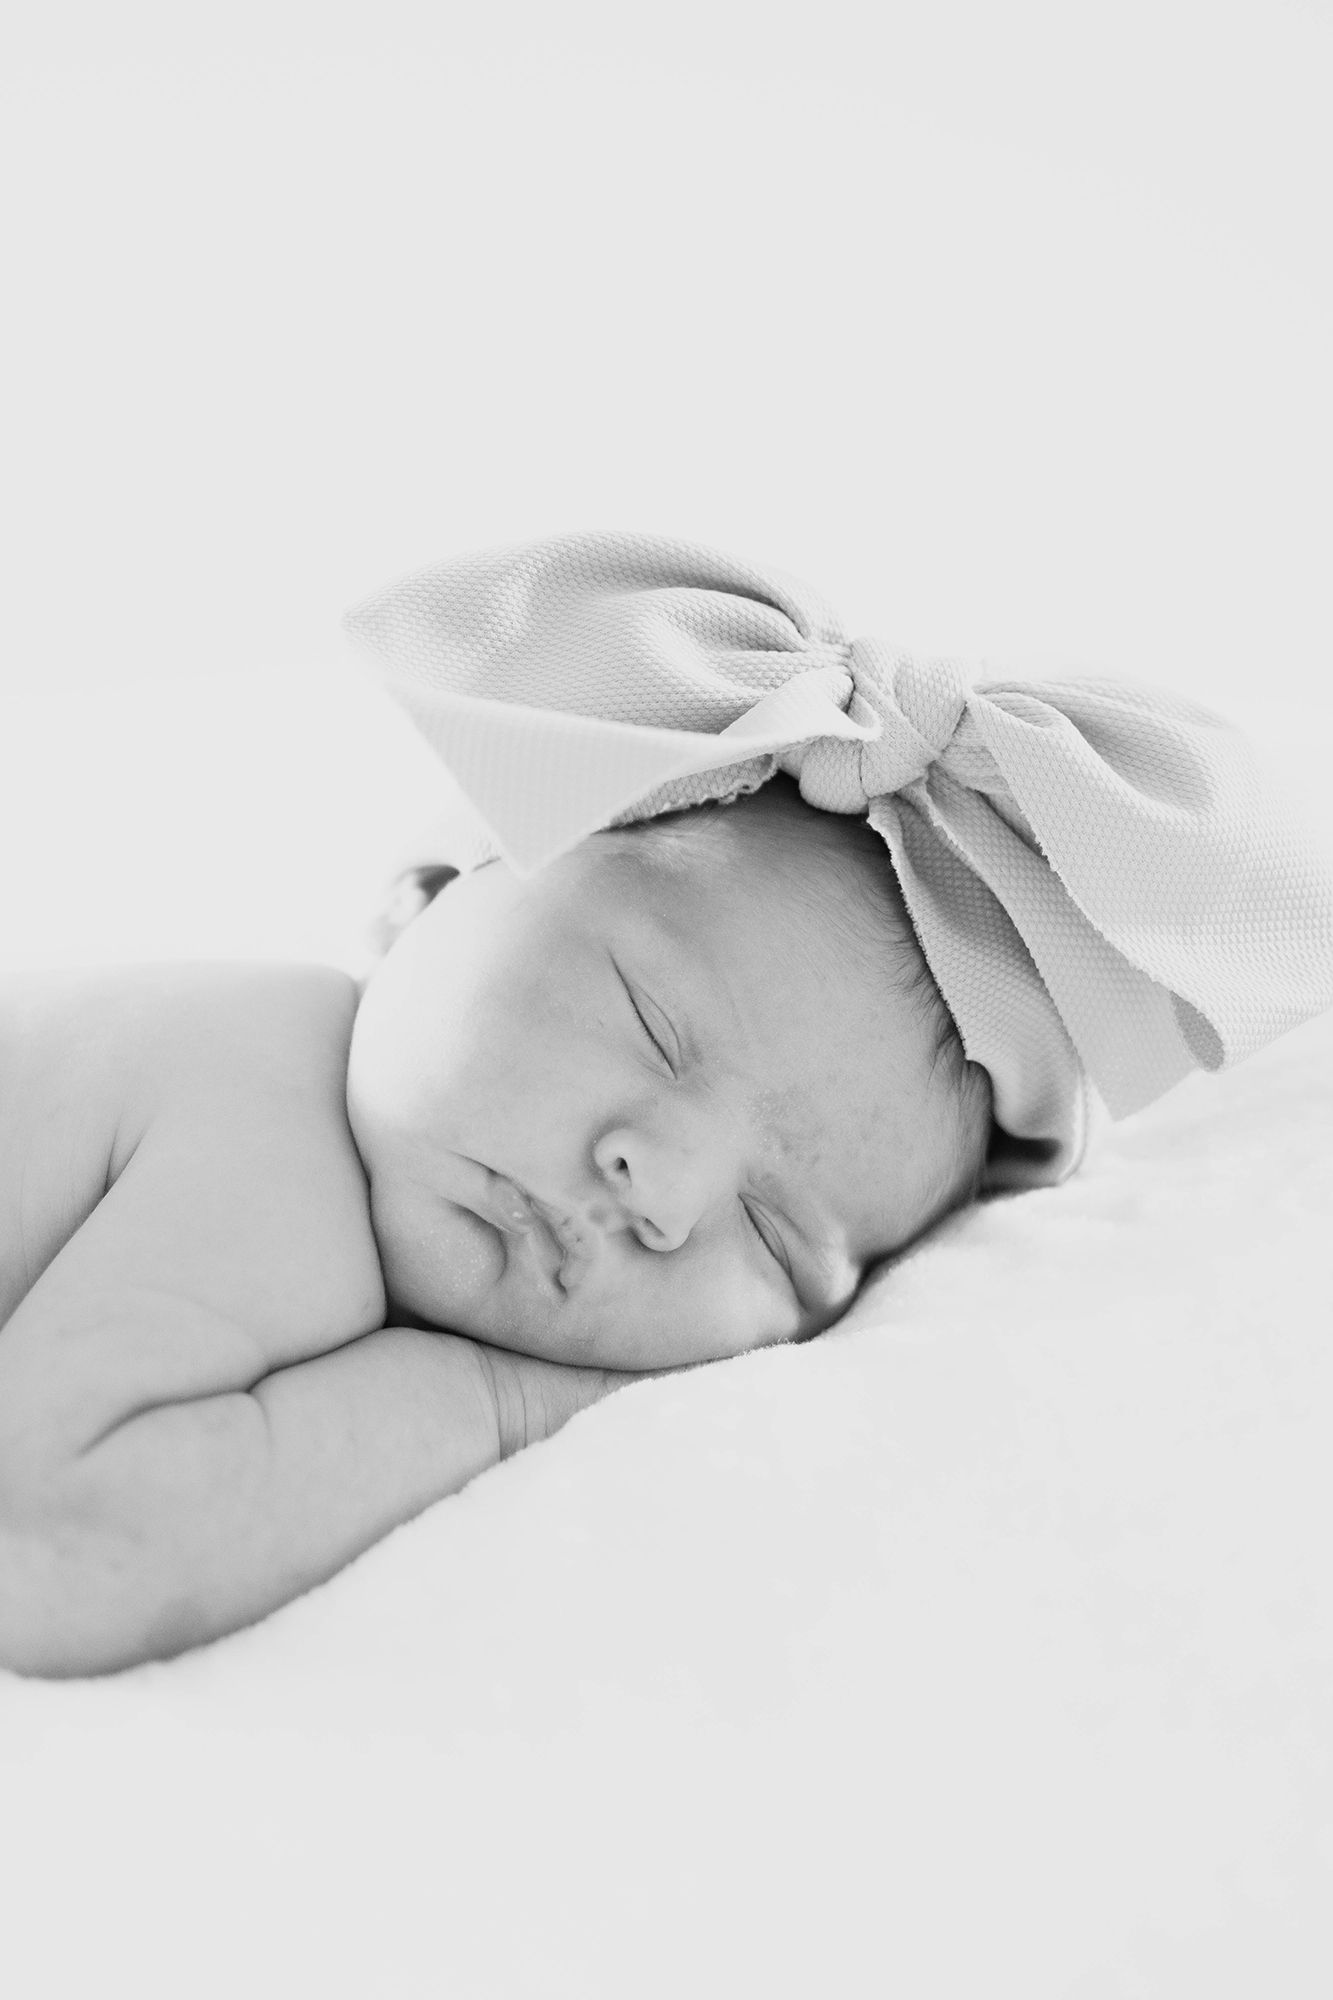
Photograph by Grace O’Driscoll
Newborn images look beautiful in black and white, adding to the peaceful look of a baby snoozing.
Equipment
I’d strongly recommend using a DSLR or mirrorless camera that gives you the option of using different lenses. You’re going to be shooting newborns in one place, so you have the freedom of using various lenses to get the best possible shots.
Prime lenses are particularly useful for newborn photography, as they give you access to large apertures. They’re also often more reasonably priced than zoom lenses with a fixed aperture throughout their range. The 85mm (on a full frame camera) is considered by many (including myself!) to be the ultimate portrait lens, although a standard 50mm lens will also give you some great images. A macro lens is also extremely useful for newborn photography as it allows you to photograph close ups of feet, fingers and eyes.
Key Lesson: Flash isn’t recommended for newborns and it’s generally recommended that you don’t use it until an infant is at least 12 weeks old. Professional photographers will use continuous lighting, but this is an expensive investment. If you’re just starting out photographing newborns, you can use household lighting (make sure to adjust your camera’s white balance setting for this) or natural light. It’s also a great idea to invest in a popup reflector, which can be used to bounce light back onto the baby’s face.
You can start off photographing newborns with a plain wall and floor. If you decide to progress with the genre, you’ll want to be investing in a backdrop and backdrop stands so that you can set up a mini studio in any location.
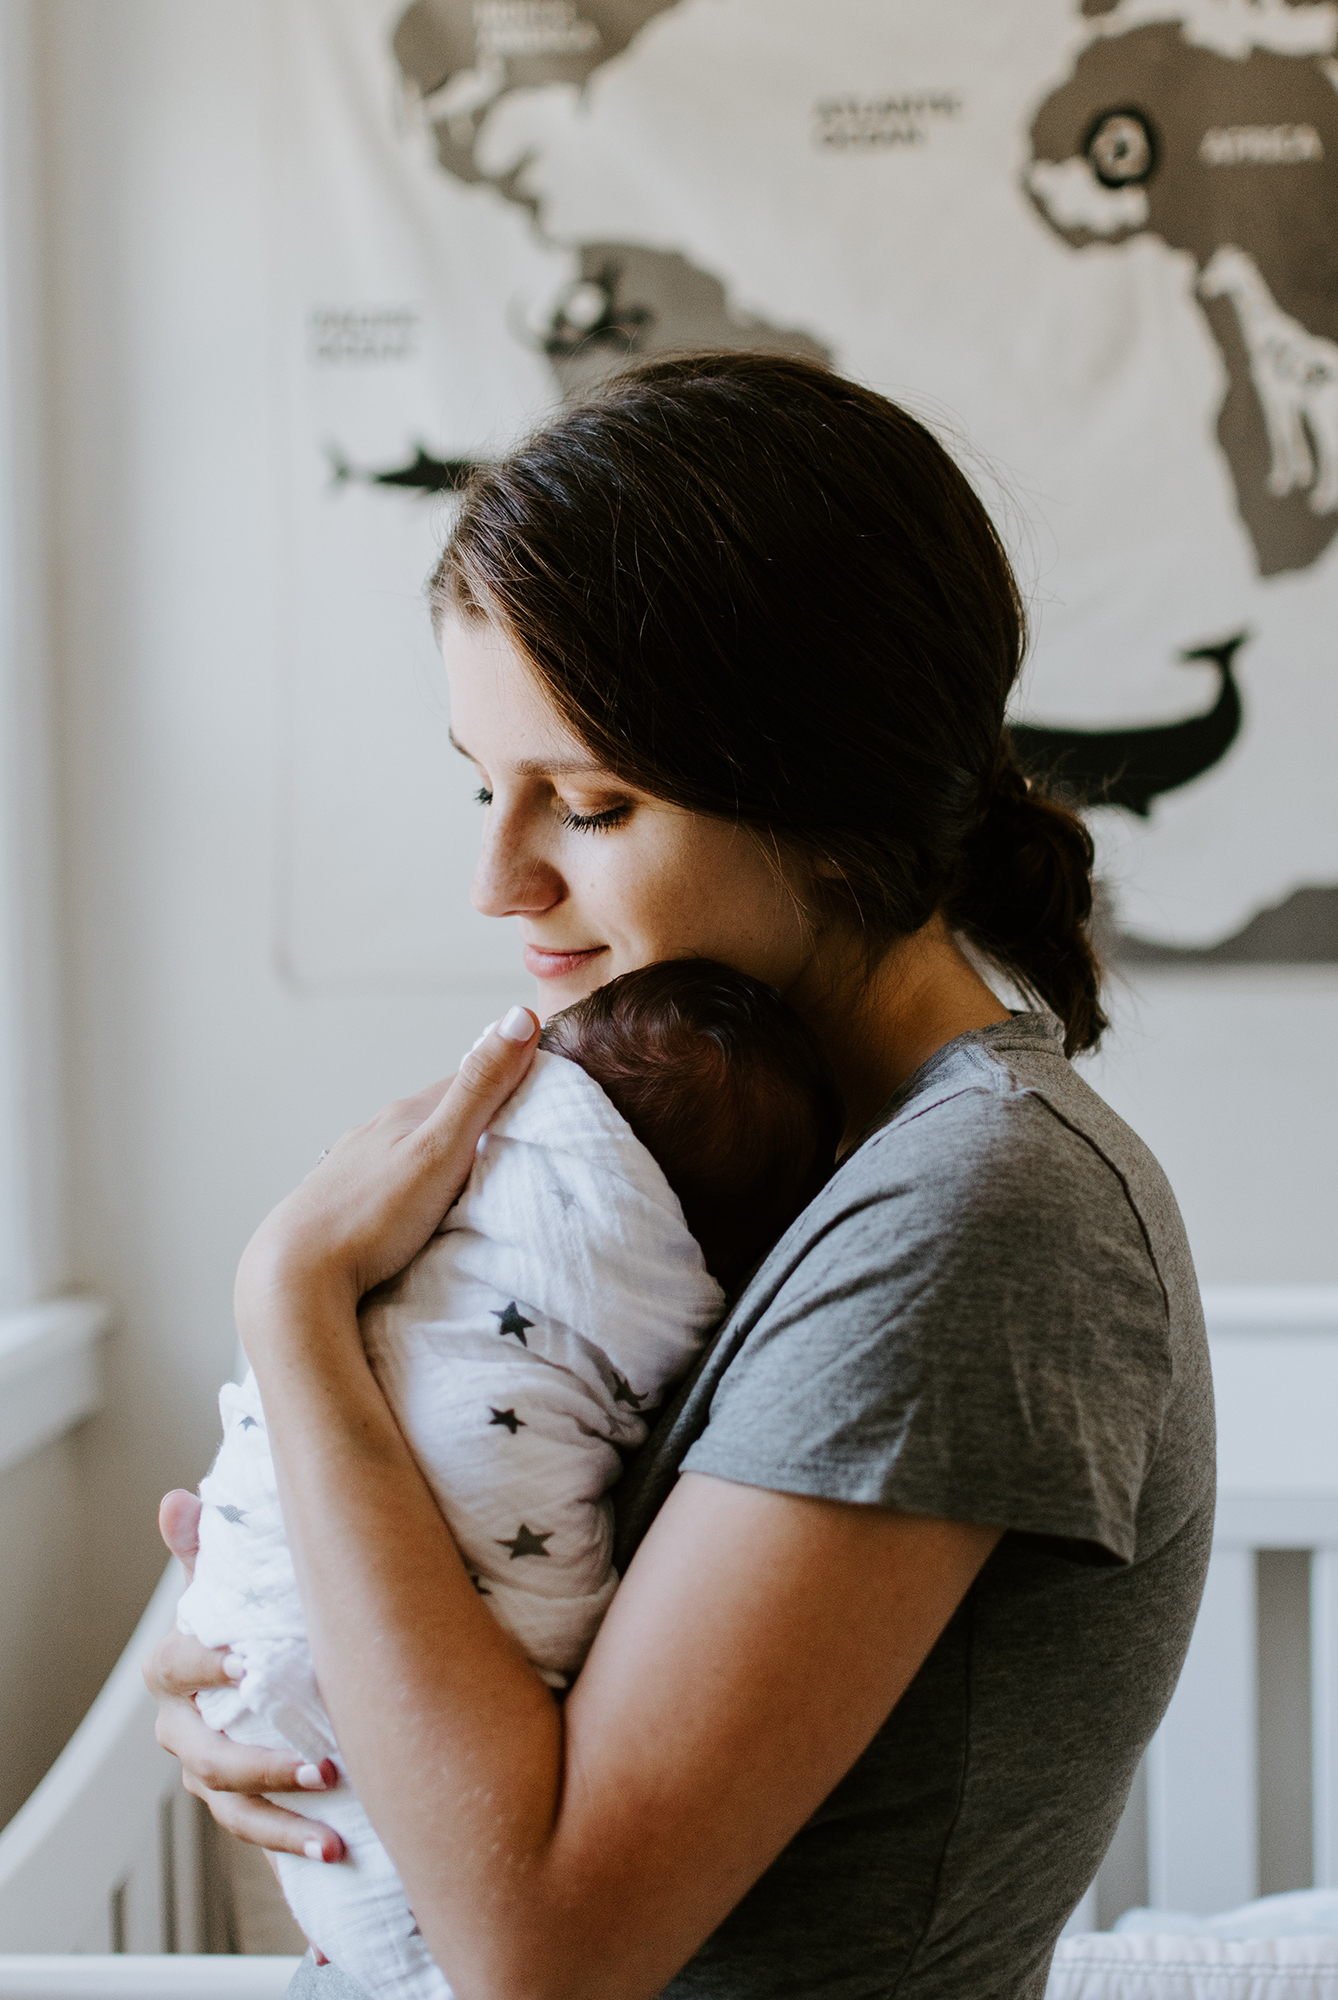
Photograph by Kelly Sikkema
If you’re photographing the newborn with their parents, try and emphasise the close relationship between them.
Props
When it comes to photographing newborns, you need props that keep the babies warm and comfortable. Do remember though that when it comes to placing a baby in a prop you should never attempt to pose them or swaddle them tightly in any fabrics (unless you’re trained to do so). Let the baby settle naturally.
A simple but effective prop is a wicker basket, which you can line with blankets or towels to create different textures and colours. You can also place babies on the floor in a nest of blankets, or use a squishy beanbag covered with a clean blanket. Scarves or cowls are also very good for laying a baby on, as they’re designed to curve and wrap around – making them ideal for propping up a newborn.
Babies also like to be warm so, unless it’s the height of summer, consider investing in a small heat pad that you can lay underneath them. It will help soothe a newborn and make them relaxed and more amenable to photos! Make sure the room is warm overall as well, as newborn photos are generally taken with the baby wearing very little! An excellent trick to help calm newborns is to download a white noise app that will remind the baby of noises from the womb. And don’t forget to have lots of wet wipes on hand to clear up any little messes!
Always ask parents if there’s a particular prop they might want to include in a shot. For example, there might be a special stuffed animal for the baby that will look great in a photograph. And photographers often forget the easiest prop to use – a parent’s hands. Placing a newborn inside a parent’s cradled hands gives a real sense of scale and shows how tiny babies are when first born.
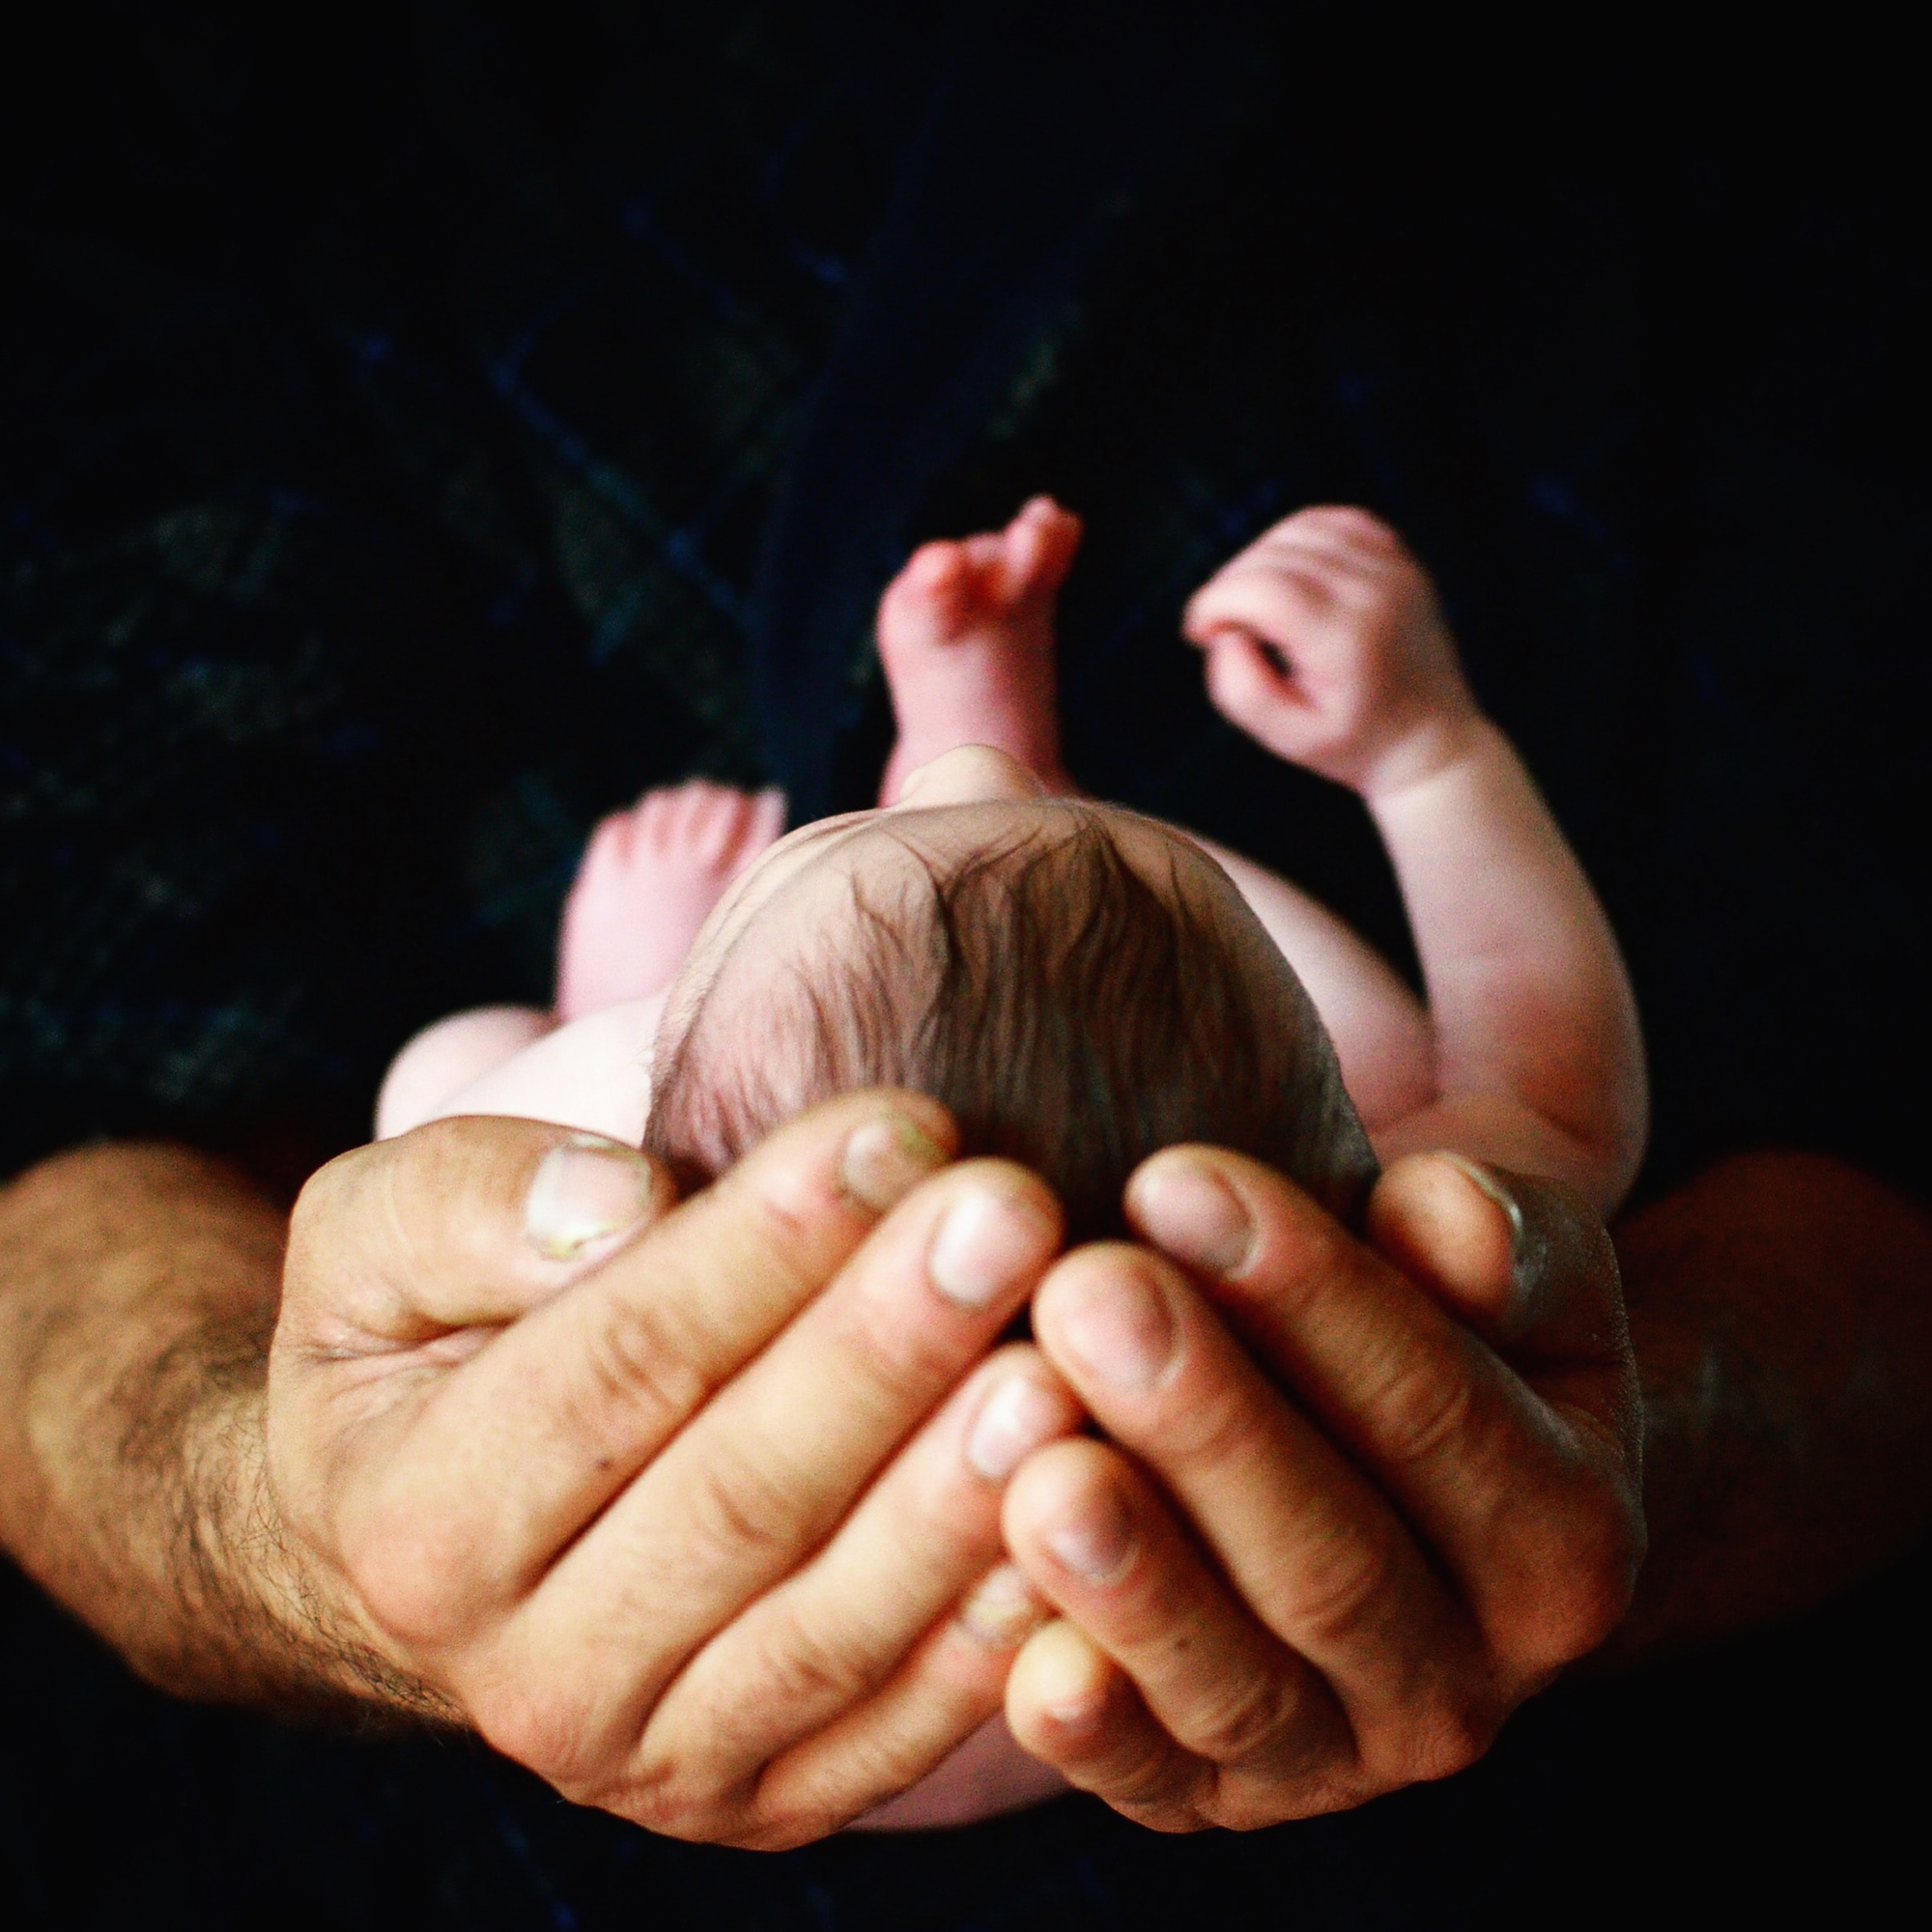
Photograph by Jill Sauve
Emphasise the size of a newborn by photographing them held in their parent’s hands.
Camera settings
Because you don’t want babies to be lying around for any length of time, it’s important to have both your camera and location setup correctly before you start shooting.
First things first – turn your camera to silent mode so that it doesn’t beep and disturb the baby (particularly important if you want to capture images of a newborn sleeping). Shoot RAW so that you’ve got as many options as possible if needed in post production. In many situations you will be able to leave your white balance on Auto, with the option to correct any colour tints in post. However, if you’re shooting with a lot of household lighting, which has a tungsten cast, it’s a good idea to switch your white balance to the appropriate tungsten setting. This will help the camera to absorb the orange tones you get with tungsten lighting.
Make sure that you have control over your AF points and choose a focal point that you can position over the eyes. As with all portraits, sharp eyes are essential for a great image. If your camera has eye detection AF, it’s worth turning on to aid with focusing.
Key Lesson: As with all forms of portraiture, your aperture will be the most important setting. This is because as well as controlling how much light comes through the iris of your lens, aperture is also responsible for controlling depth of field. You will want to use a small depth of field with newborns to focus the viewer’s attention on the baby and blur out any distracting background details.
If you’re just focusing on a tiny detail, such as a baby’s foot, you will probably only need an aperture of around f2 – f2.8. I would use an aperture of around f4 for the whole baby and between f5.6 and f8 if you’re including a parent’s hands (for example). If you’re photographing the parents with the newborn, you may need to use an aperture of f11 to get everyone sharp. You will need a shutter speed of at least 1/60th to prevent camera shake and, if you’re using a longer telephoto lens, you should use a shutter speed equivalent or faster than your focal length (e.g., 1/200th with a 200mm lens).
Aperture and shutter speed are your first two priorities when shooting newborns, so you will need to use your ISO to get the correct exposure. If you’re shooting inside, you will probably find that you need to push your ISO up to ensure the correct exposure. Whilst modern cameras can cope with higher ISOs, do consider adding in some artificial light to keep settings at a lower level.
Taking the photographs
If you’re photographing outside, make sure it’s on a warm day and keep the baby away from direct sunlight. When shooting indoors, I’d recommend placing the baby close to a window so as to get as much natural light as possible on your subject.
The main buzzword when it comes to photographing newborns is patience! Nothing happens quickly. You will need to be prepared to take frequent breaks for feeding, nappy changes and soothing the baby. However, don’t be afraid to take plenty of photos while the baby is asleep. It’s often easier to position babies when they’re asleep and the resulting images can be truly lovely.
Although newborn images often look best when you photograph on the same level as the baby, you can experiment with shooting from above as long as you watch your proportions. Don’t forget to capture small details and remember that simply changing a prop or using a different coloured blanket will give you a different look and feel. It’s also important to capture the parents with their new baby. It’s a rare mum who wants to be photographed full length just after giving birth, so instead go for tight crops that emphasise the relationships. When the baby is awake, concentrate on getting photos that show off their eyes. Above all, work with the newborn. Don’t force them into any positions and if they don’t like the way they’re lying and start crying, let the parents adjust things immediately. Safety is always the priority when it comes to photographing little ones.
Lastly, make sure the shoot is fun for Mum and Dad! Don’t stress them out and let them take things at their own pace.
As with all photography, how much work you do in post production is up to you and depends on the look you’re going for. Baby shots really should be left as natural as possible, but newborns can be a little red in the face and suffer from a little skin acne. Removing any blemishes and adjusting the skin tone slightly won’t detract from an image. And, if you’re working with available light, you may find that you need to soften shadows and potentially adjust your white balance. Remember that newborn images also work extremely well in black and white.
In conclusion
Newborn babies really can’t look bad in photographs – they even look good sleeping! But photographing tiny babies can be challenging as you only have a limited window to work in. But by taking your time and working with a baby’s schedule you’ll be able to produce some beautiful imagery.
Self-help quiz
- What lens is often regarded as the ultimate portrait lens?
- What piece of equipment is used for bouncing light back onto a newborn’s face?
- Should you swaddle a baby or not?
- What minimum shutter speed should you use with a 200mm lens?
- Which part of the body should always be sharp in a portrait?