Without light there is no image! Understanding and working with light (both natural and artificial) is one the key elements of photography. But when you first start out shooting, you’re going to come across some common lighting problems. In this guide, I’m going to show you how to deal with and fix them.
Here’s what we’ll cover:
- Overexposed sky; underexposed foreground
- Underexposed backlit subjects
- Low light
- Orange tints on indoor shots
- Photographing snow

Photo by Sean Pierce | This image is a prime example of shooting successfully in low light, but it also illustrates an occasion when using a Graduated Neutral Density filter would make it easier to balance the exposure throughout the shot
Overexposed sky; underexposed foreground
This is probably the most common of lighting problems. A bright blue sky with fluffy clouds always looks visually appealing but combine it with a landscape that’s full of darker colours such as dense trees and you can start running into issues.
The problem occurs because your sky will generally be a couple of stops lighter than your foreground. Leave the metering up to your camera and it will try to even the entire shot out to an average. This can lead to overexposed and washed-out white skies, combined with underexposed foregrounds.
Fortunately, it’s fairly simple to correct for this by purchasing a graduated neutral density filter (GND). These invaluable filters are dark at one end and graduate down to clear at the other. The dark part of the filter should be put over the sky, with the gradient where the dark and light meet placed over the horizon. Conversely, this can be reversed if you’re suffering from overexposed skies, whereby the metering system has caused the sky to be bleached of colour. ND filters comes in a range of f-stop ratios (2, 4, 6, 8. 10), which means that there will be this number of f-stop differences between the dark and clear parts of the filter.
If you’re out and have forgotten your GND, you can still capture the scene by taking several photos with one exposed correctly for the sky and another for the foreground. You can then blend these together in post production.
Underexposed backlit subjects
Lighting a subject from behind can give beautiful effects, but it can also confuse your camera! Because the camera is trying to balance the exposure for the whole frame, your subject can often be left underexposed. It is very simple, however, to correct for this problem by changing your metering to centre weighted. As this puts the emphasis on the exposure of the centre of the image, the camera will correctly expose your subject. Alternatively, if you have a modern DSLR, you’ll be able to link your active AF point to the spot metering, which will allow you to expose correctly for subjects which are off-centre. Do remember that spot metering only meters for the central 5% of the image.
Is your subject still looking a little flat? You need to bounce some light back onto your subject. A small portable reflector can often be enough, or you can use a little fill-in flash with a flashgun set to low power and used off-camera (you can get cables or remotes to allow you to use your flash untethered.
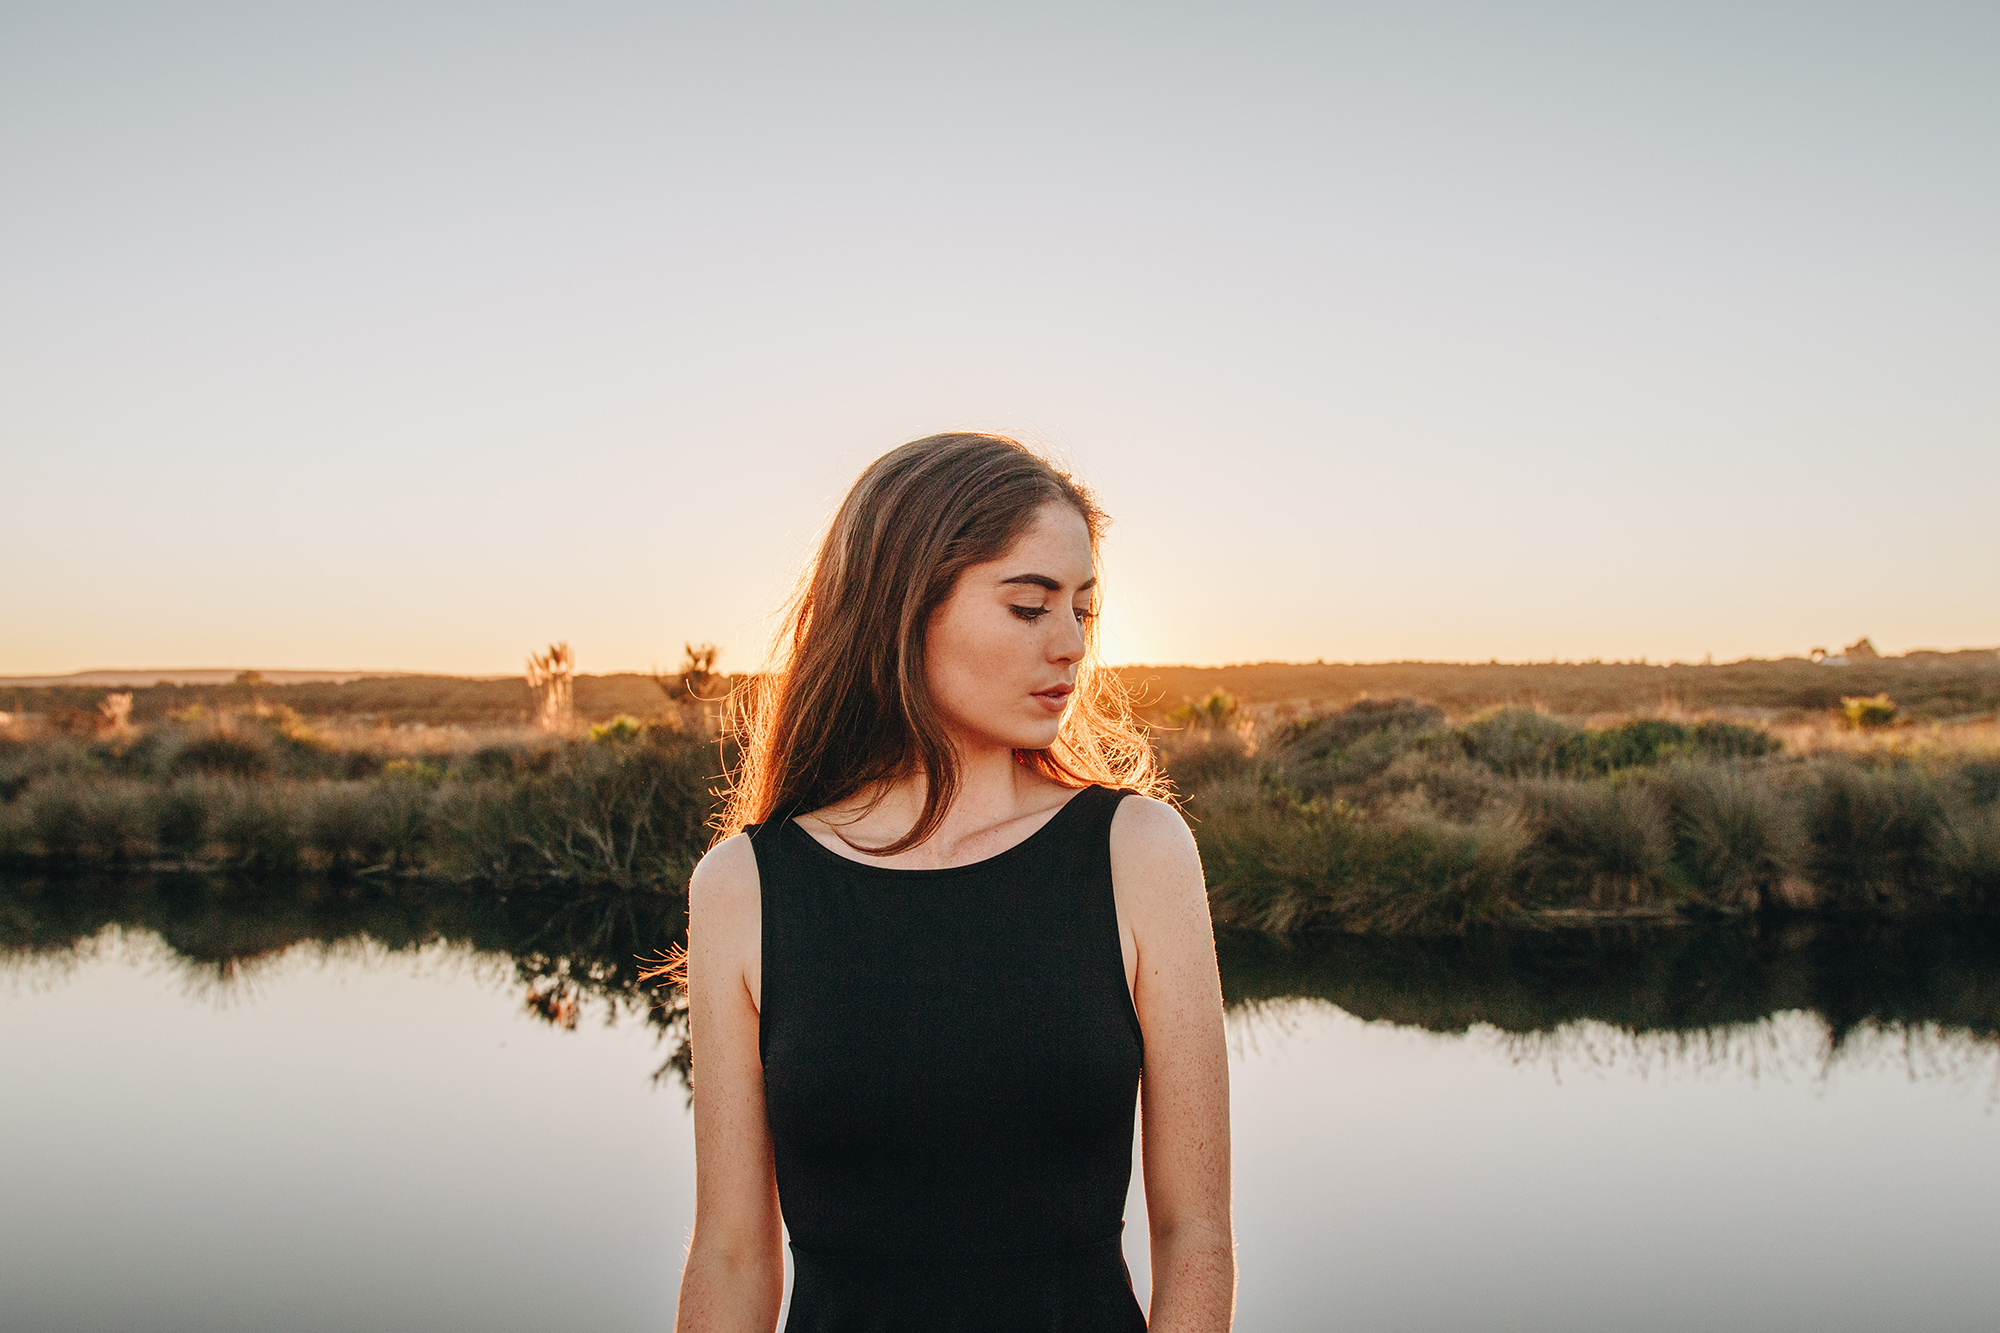
Photo by Sonnie Hiles | A lovely example of backlighting a subject, whilst still keeping enough light on the face to prevent any shadows
Low light
Another very common problem – particularly if you’re shooting indoors or in the Northern Hemisphere is low light. By this, I mean that there isn’t enough ambient light to correctly expose an image. This is obviously also an issue at night time!
If you’re shooting a stationary landscape or cityscape this is easily fixed by simply using a tripod. This allows you to use a larger depth of field (around f16 / f22), which is a small aperture and therefore doesn’t let a lot of light into your lens. You’ll also want a low ISO to avoid any noise on your image. To combat this you can use a longer shutter speed, which is why you’ll need the tripod to avoid camera shake.
But what if you’re shooting portraits or a moving subject? You can’t use a slow shutter speed as you will just end up with a blurred image. One solution is to use a fast lens with a large maximum aperture (e.g. f1.4, f2.8). This will let far more light into your lens but will result in a very small depth of field. This can work well for portraits though, as it will blur out any distracting details in the background. Make sure though that you focus carefully on the eyes to ensure that they are sharp.
What if this isn’t enough? You can obviously raise your ISO, but this will add noise into your images. Modern cameras are fairly forgiving though and you should be able to raise your ISO up a fair way before you see any issues. Professional photographers use studio lighting for portraiture to add soft and natural lighting to an image. But studio lights aren’t cheap. When you’re starting out, you can use a flashgun off camera to add some light into an image. Just make sure you diffuse the flash – you can buy small softboxes or use a Sto-fen – a small diffuser that slots onto the front of your flashgun.
Orange tint on indoor shots
Most of us will want to snap photos around the house, particularly when we’re starting out. But you might notice that your photos have a nasty orange tint to them. Why is this and what can be done to fix it?
You might not know that light has different colour temperatures, depending on the time of day outside and the type of lighting used inside. This is measured in a unit called Kelvins. Normal household bulbs emit something called Tungsten light, which has a rating of 2500 – 3500 Kelvins (K). Normal daylight is rated at between 5000 – 6500K and electronic flash at between 5000 – 5500K. So you can probably already work out that tungsten lighting is very different from natural light!
So, how do you correct for this orange tint? All cameras come with different white balance settings designed to help your camera cope with these colour casts and produce a natural looking image. But a camera will be defaulted to Auto white balance (AWB). Whilst AWB is really very good and can cope with most lighting situations easily, tungsten lighting in particular can overwhelm it – particularly if there’s also some ambient lighting coming through a window. If you’re shooting indoors, I’d advise switching to the Tungsten white balance setting, which is specifically designed to cope with and eliminate any orange tint.
Photographing snow
Okay, I’m cheating a little here as snow isn’t necessarily a ‘common’ lighting problem, depending on where you live in the world! But photographing crisp, fresh snow is fairly magical and something that most beginners long to do if they have the chance. It is a little tricky though as your camera will want to make everything in your image mid-toned, which can lead to snow that looks grey. Here’s a quick bullet point list of how to photograph snow successfully:
- First, frame your shot and focus. Then zoom in to a bright area of snow in the scene. Using your exposure compensation button, dial in a value between +2/3 to +1 2/3 EV, depending on the brightness of the snow. Take a meter reading, remember the settings, switch to manual, and dial in the new shutter speed and aperture. This overexposure will ensure that the snow looks white, but it won’t blow out other objects in the photo.
- If any mid-tone objects (such as a gray rock or building) are visible in the scene, take a meter reading off these. Setting your camera to these settings will then help it to render the snow correctly. You may have to dial in a little negative compensation (such as -1/3 EV) to stop the highlights in the snow from being blown out.
- Alternatively, you can just use your camera’s histogram to correct exposure. Take a test shot and check the histogram. If it is slightly “humped” in the middle, then just dial in a little positive compensation to add brightness. If the graph appears to fall off in the right-hand edge, then just dial in a little negative compensation to stop blown out highlights.
- Don’t forget to use a lens hood when photographing snow. As snow is so bright, it creates a lot of flare that can make photos look very hazy. And don’t use a flash to photograph a scene whilst it’s actually snowing, as the flash will turn snowflakes into distracting balls of overexposed light.
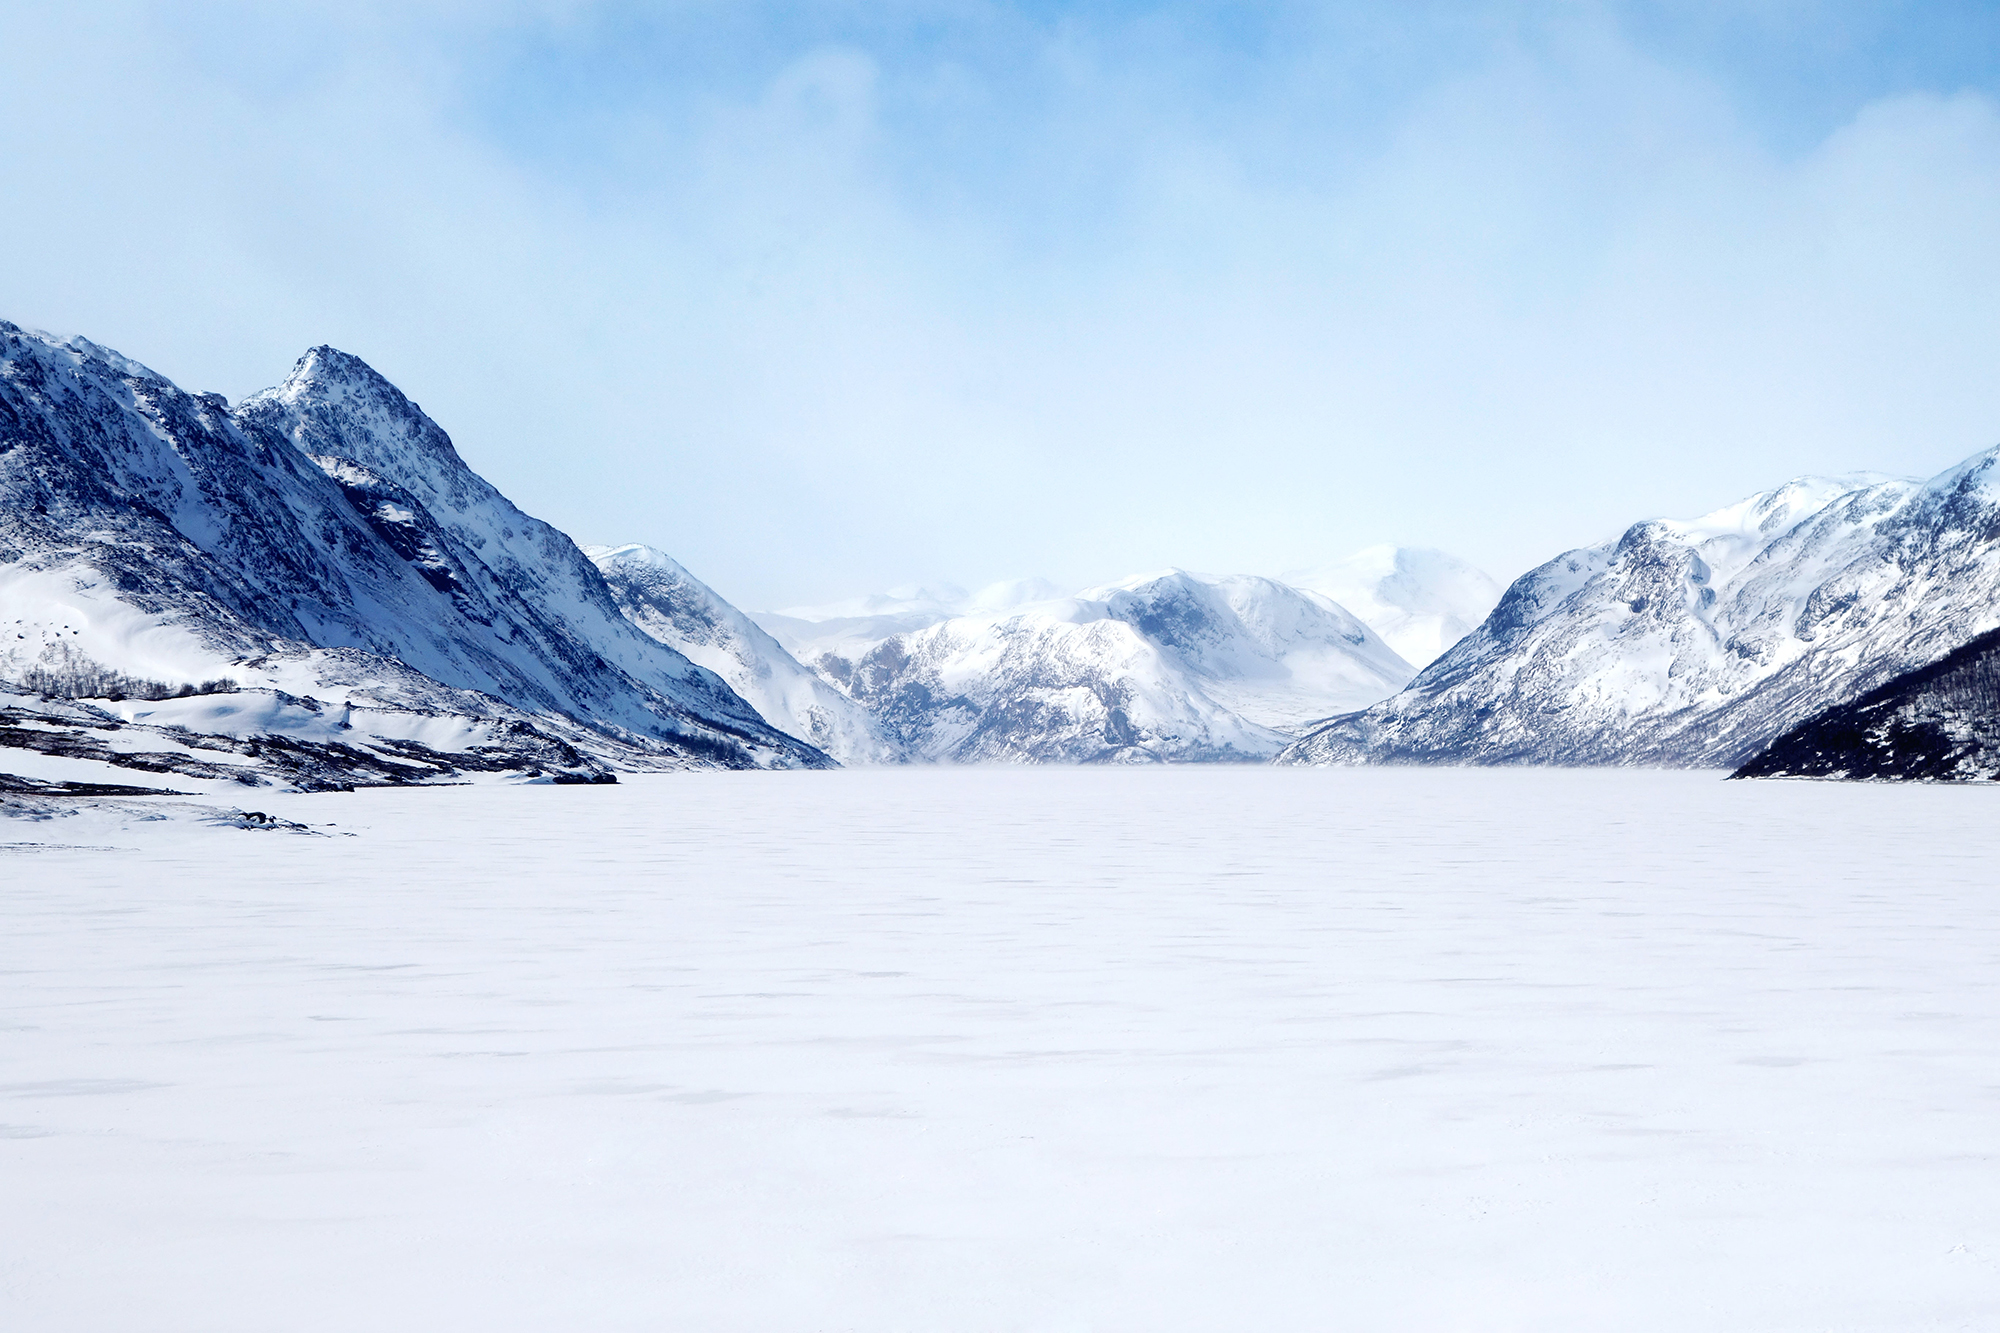
Photo by Francesca Hotchin | Crisp, white snow looks beautiful in photos but is challenging for your camera
In Conclusion
Whilst these are by no means all the lighting problems out there, they are some of the most common ones. Mastering the techniques I’ve talked about here will immediately improve your photography and make it far easier to get correctly exposed shots. Have fun practicing!
Self-help quiz
- Which filter should you use to balance out overexposed skies and underexposed foregrounds?
- Which metering mode should you use for backlit subjects?
- Is f16 a small or large aperture?
- Is f2.8 a small or large depth of field?
- What type of light are normal household bulbs?
- Which function will you be using to correct exposure when photographing snow?
Cover Photo By Logan Troxell