Flowers are such beautiful objects and they make for fantastic photographic subjects. The amazing colours and shapes are visually appealing, plus flowers are great for practicing your still life photography skills! But getting the images right does require technical knowledge and lots of practice. In this guide, I’ll tell you everything you need to know to get perfect flower photographs every time you shoot.
Here’s what we’ll cover:
- Equipment
- Camera settings
- How to shoot (including composition and techniques to try out)
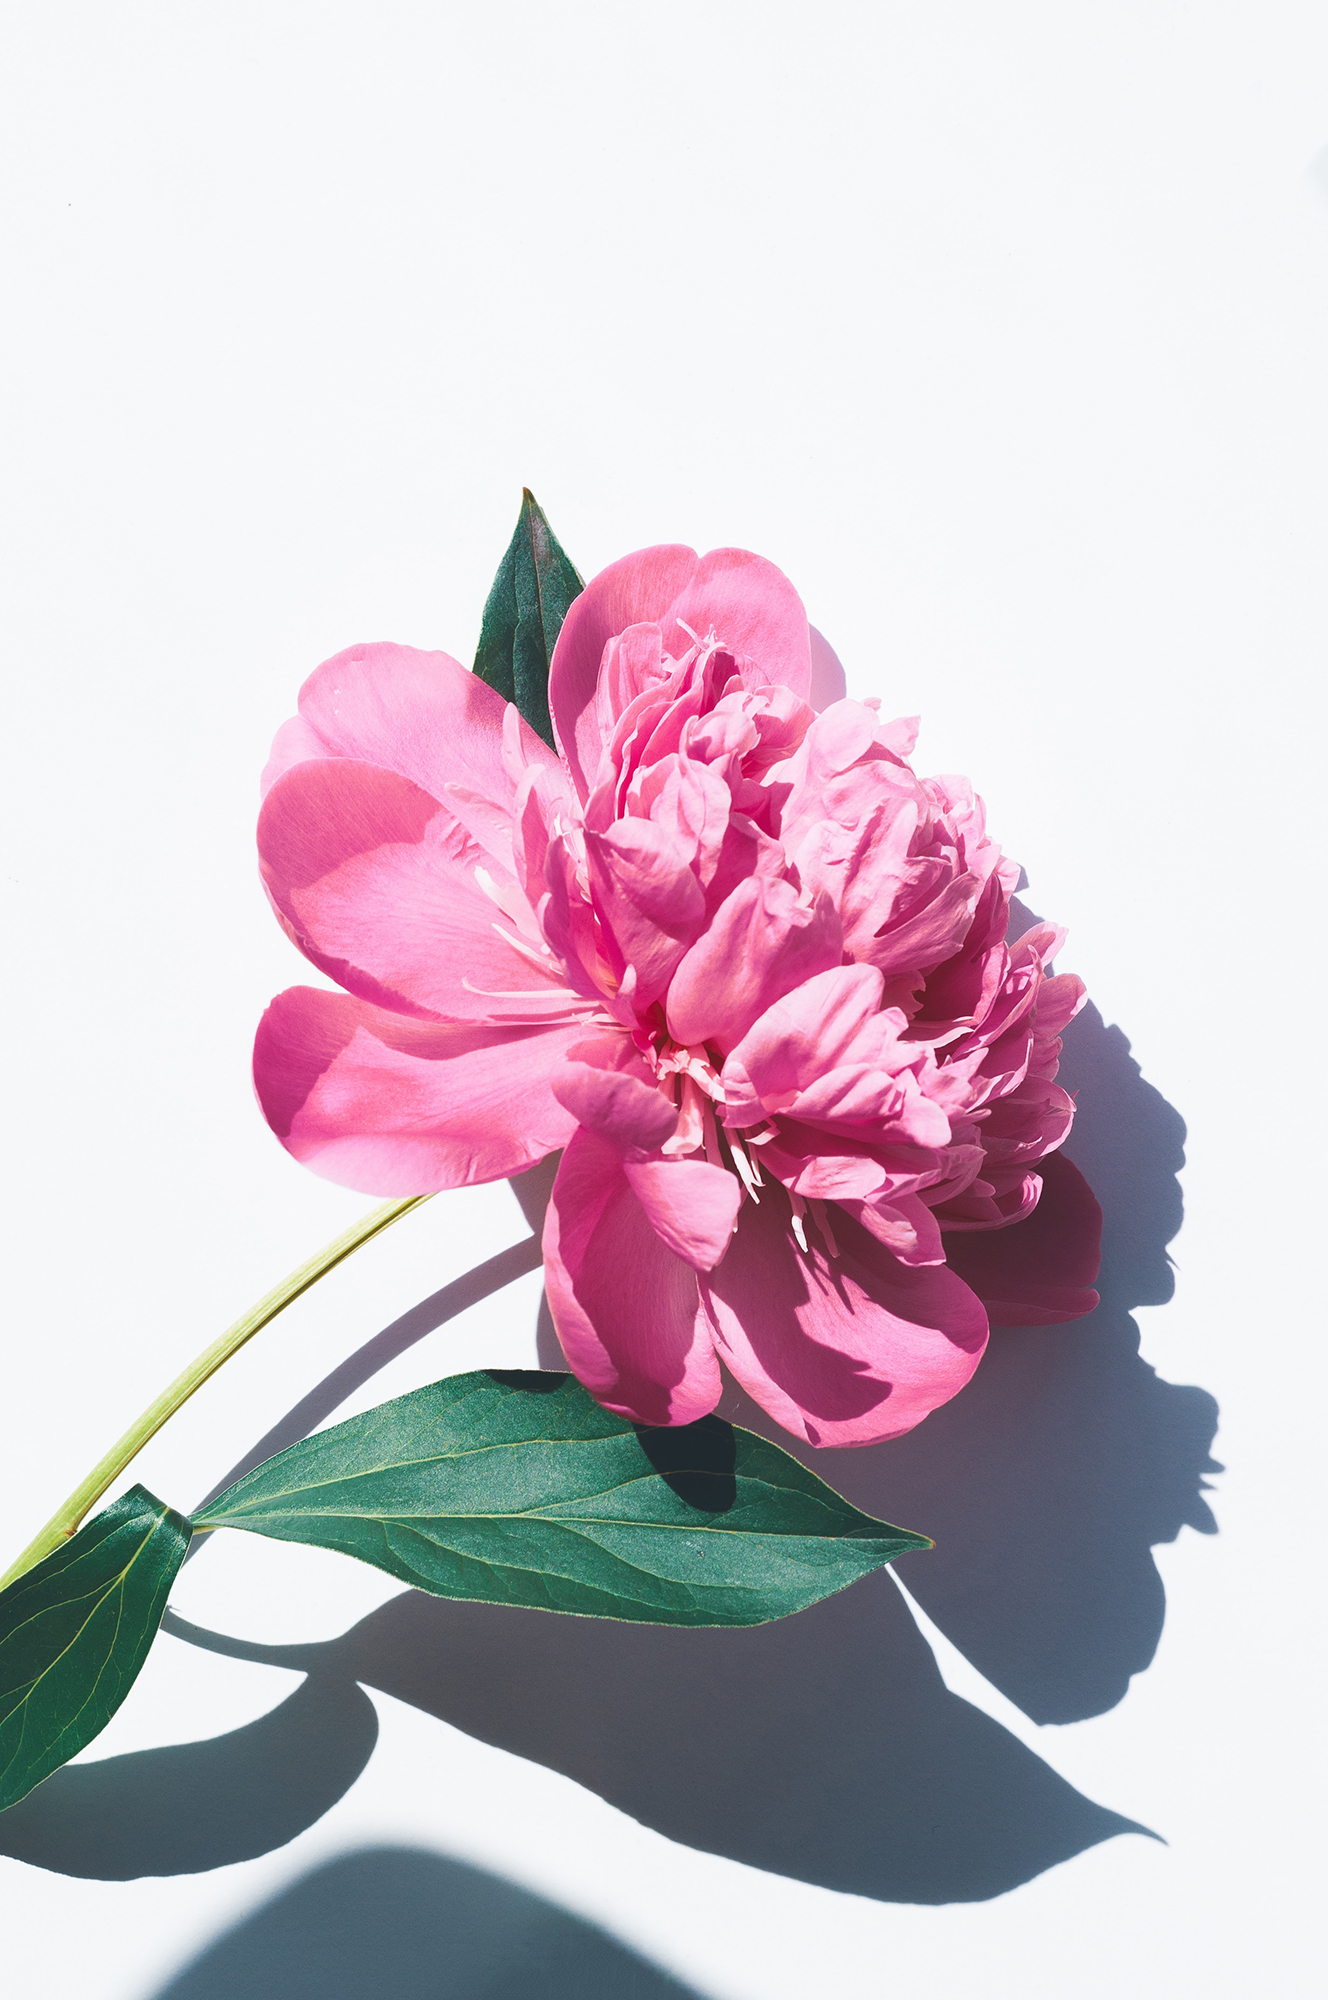
Photograph by Olia Gozha | Using plain backgrounds helps to make flowers ‘pop’ out of the photo and draws attention to their vibrant colours.
Equipment
To get the best out of flower photography, you really want to be working with a camera that allows you to use different lenses. When it comes to flowers, it really is all about the lenses – they can make a huge difference to the look and feel of the shot. You can shoot with any lens, from wide-angle to telephoto, but the higher your lens magnification, the more options you’ll have for flower photography. For this reason, a macro lens is the best choice for flower photography. Allowing 1:1 magnification, a macro lens allows you to get extremely close to your subject.
Unfortunately, macro lenses don’t come cheap so if you just want to try out something similar you could use an extension tube on your lens. These will allow you to get closer to your subject and greatly reduce your focusing distance. The flipside? You’ll lose one or two stops when using them.
Using flash is a personal choice when it comes to photographing flowers, but it can be extremely useful if you’re shooting in hard sunlight and need to soften shadows with some fill-in light. If you shoot with a flashgun at 1:1 or 1:2 magnification, you will also end up with a very dark or completely black background, which can be very effective at isolating and enhancing your subject. A small reflector can also be useful to help you reflect light onto the flowers.
Key Lesson: I would strongly recommend using a tripod when photographing flowers and macro in general. Flowers aren’t always stationery and macro work requires very careful focus, so a tripod will give you more options and help prevent camera shake. If carrying a tripod isn’t practical, invest in a ‘Pod’ – a small beanbag with a tripod screw in the top of it. This means you can place the camera safely on the ground and enables you to still use long exposures.
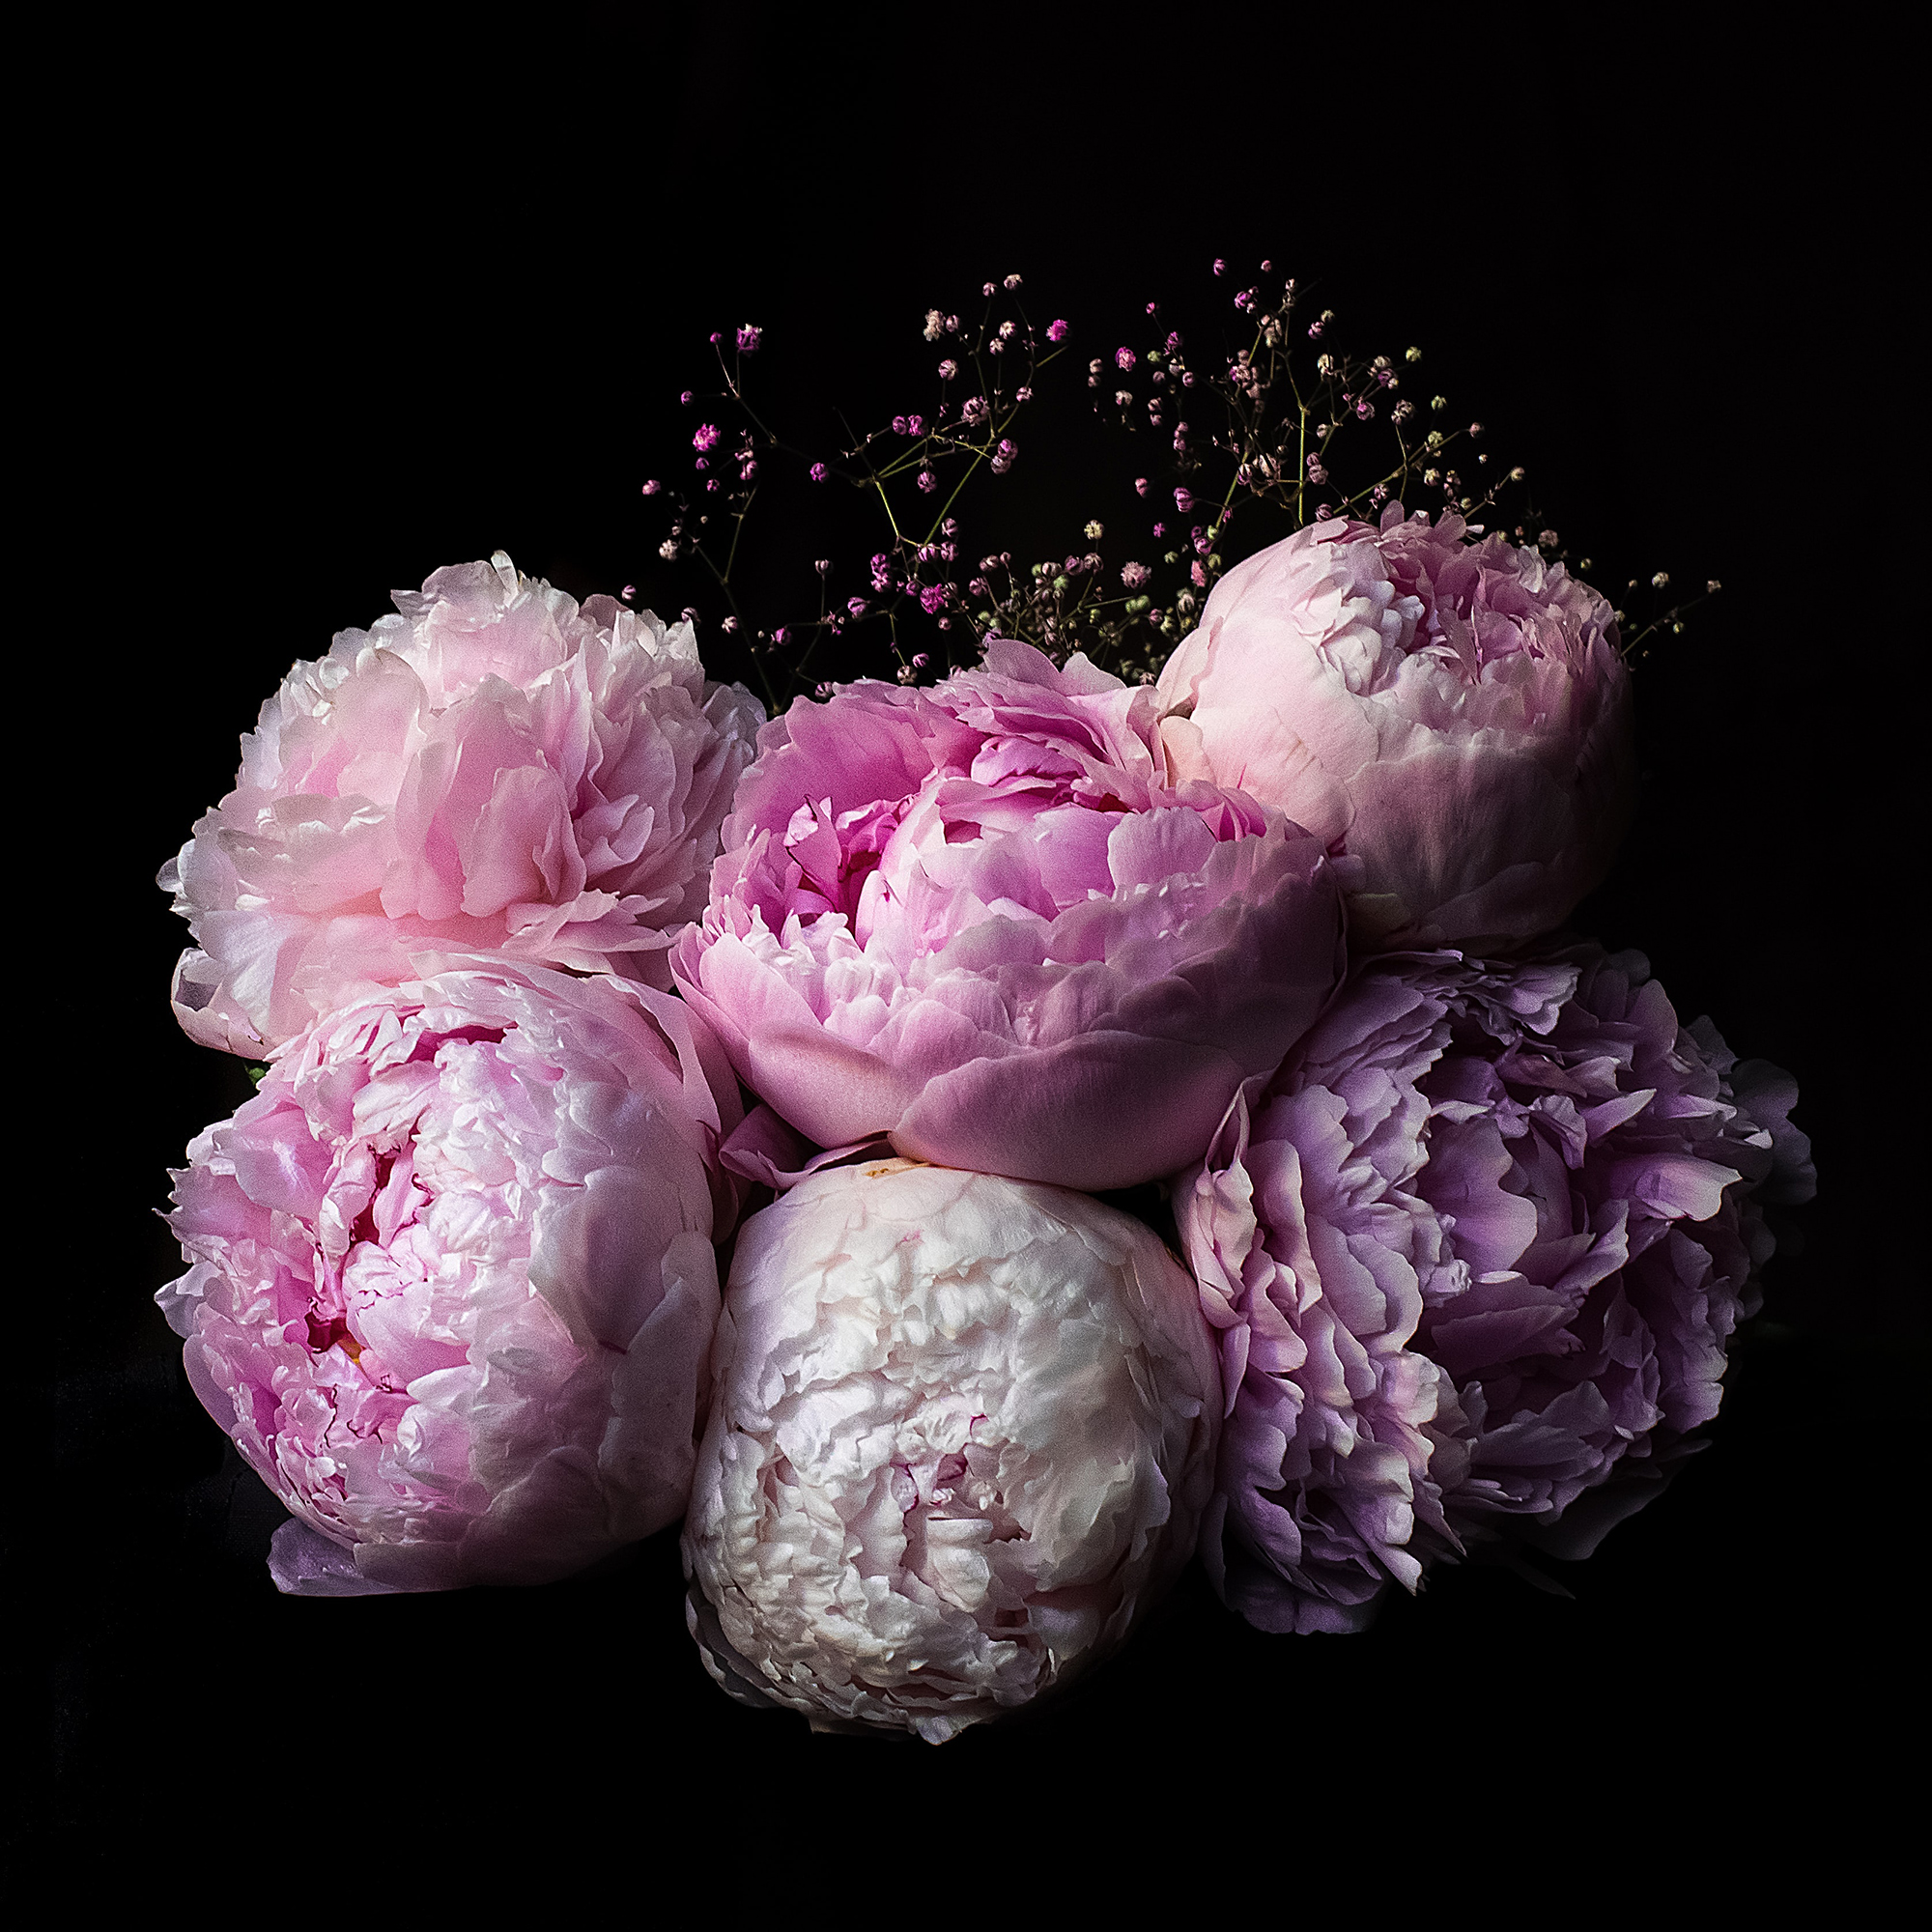
Photograph by Cristiane Teston | Using flash on a 1:1 magnification will turn your background black and give a dramatic feel to your flower images.
Camera Settings
Shoot in RAW – you’ll want to have as much control over your images in post production as possible and RAW gives you the most data to work with. You can leave your white balance on Auto or Daylight as you’ll be shooting outside – you can easily make tweaks in post production if necessary.
Focusing with macro lenses can be tricky but if you’re photographing an entire flower, you should be fine with autofocus. It is, however, important that you switch your AF mode so that you can choose which AF point or points you’re using to focus with.
Key Lesson: If you only want to photograph part of the flower, you may find that your autofocus starts to struggle. If your camera can’t focus on the part of the flower you want to shoot with autofocus, switch to manual focus. When working with subjects where you’re focusing at 1:1 magnification or smaller, even moving your camera forwards or backwards a few millimetres can throw out the focus. In these situations, it’s easier to set your lens’ focus at a specific magnification and then gently rock your camera forwards and backwards in tiny increments until you’ve got a sharp image.
Aperture controls depth of field as well as the amount of light coming through the iris of your lens and you’ll want a smaller depth of field for flower shots to blur out any distracting backgrounds. For most photography, this would involve using a large aperture (f2, for example). But as you’re working with small subjects and macro lenses, you’ll likely find that you will have a more minimal depth of field to start with. And the closer you get to your subject, the smaller this will get. Therefore I’d recommend starting with an aperture of f8 but do be aware that you might need a far smaller aperture for partial areas of a flower (for example, f16) in order to get any depth of field in your shot at all. Of course, if you’re shooting a whole wildflower meadow you may well want a larger depth of field to get it all in focus and would still be shooting at around f16!
Even at small apertures you may struggle to get a large enough depth of field to get your subject sharp. If this is the case and you’ve reached the smallest aperture your camera and lens is capable of, you could consider focus stacking. The technique involves shooting a series of images with different focal points and then combining them in post production.
It’s also worth noting that when you’re working with small subjects even a slight breeze is magnified and could well cause blur in your images. I’d suggest using a shutter speed of at least 1/125th to keep everything pin sharp. Keep your ISO as low as possible to avoid noise on your image, although you may well have to raise it in overcast weather if you’re not using flash.
Photograph by Magda Lukas | You don’t just need to photograph individual flowers! Groups of flowers can make beautiful and delicate images.
How To Shoot (Including Composition and Techniques To Try Out)
Now we’ve covered your equipment and settings, let’s look at some tips for actually shooting!
- Overcast skies – Bright sunlight is beautiful, but it’s not the best lighting when you’re photographing flowers. This is because sunlight produces shadows and these are going to be extremely obvious when you’re photographing small subjects such as flowers. Instead, wait for an overcast day. There are no shadows or bright spots and you’ll get a lovely, even exposure that’s a bit like using a giant softbox! Make sure you photograph around the middle of the day though, otherwise the light could be too dull to get a decent exposure.
- Use your angles – Most flower photographs are taken from the front and straight on to the flower. And these can produce stunning shots – the interior and shape of flowers is always beautiful. But it’s also worth thinking about different angles and views. Flowers also look great when they’re photographed in profile for example. Make sure you look around the entire flower for inspiration and don’t forget to explore high and low angles for further options.
- Pay attention to your background – Although your background is likely to be out of focus, it can still be a huge distraction if it’s cluttered or full of clashing colours to your flower. Your background needs to compliment your flower or create a strong contrast. Solid colours work best and will help your flowers ‘pop’ out of the image.
- Backlighting – If you have no choice but to photograph in bright, sunny conditions you do have options! You could use a flashgun to fill in shadows or, if you don’t have a flash, a small reflector to bounce light and soften shadows. However, one of the most successful ways to work with bright light is to backlight your flowers. Shoot with the sun directly in front of you, lighting the flower from behind. As flower petals are translucent the backlight will make them appear to glow. Try and photograph later in the day – the light will be softer and nearer to the horizon (and thus, your flowers).
- Bring flowers inside – If conditions aren’t great outside, you could consider bringing a cut flower indoors to shoot. This is a great way to practice using artificial lighting as well! Flowers look great laid on a piece of black velvet. Velvet absorbs light, meaning you can light the flower from the front with a flashgun and use the velvet to avoid harsh shadows. You could also consider investing in a small light tent. You place the flower inside it and light from the outside – the material diffuses and softens light.
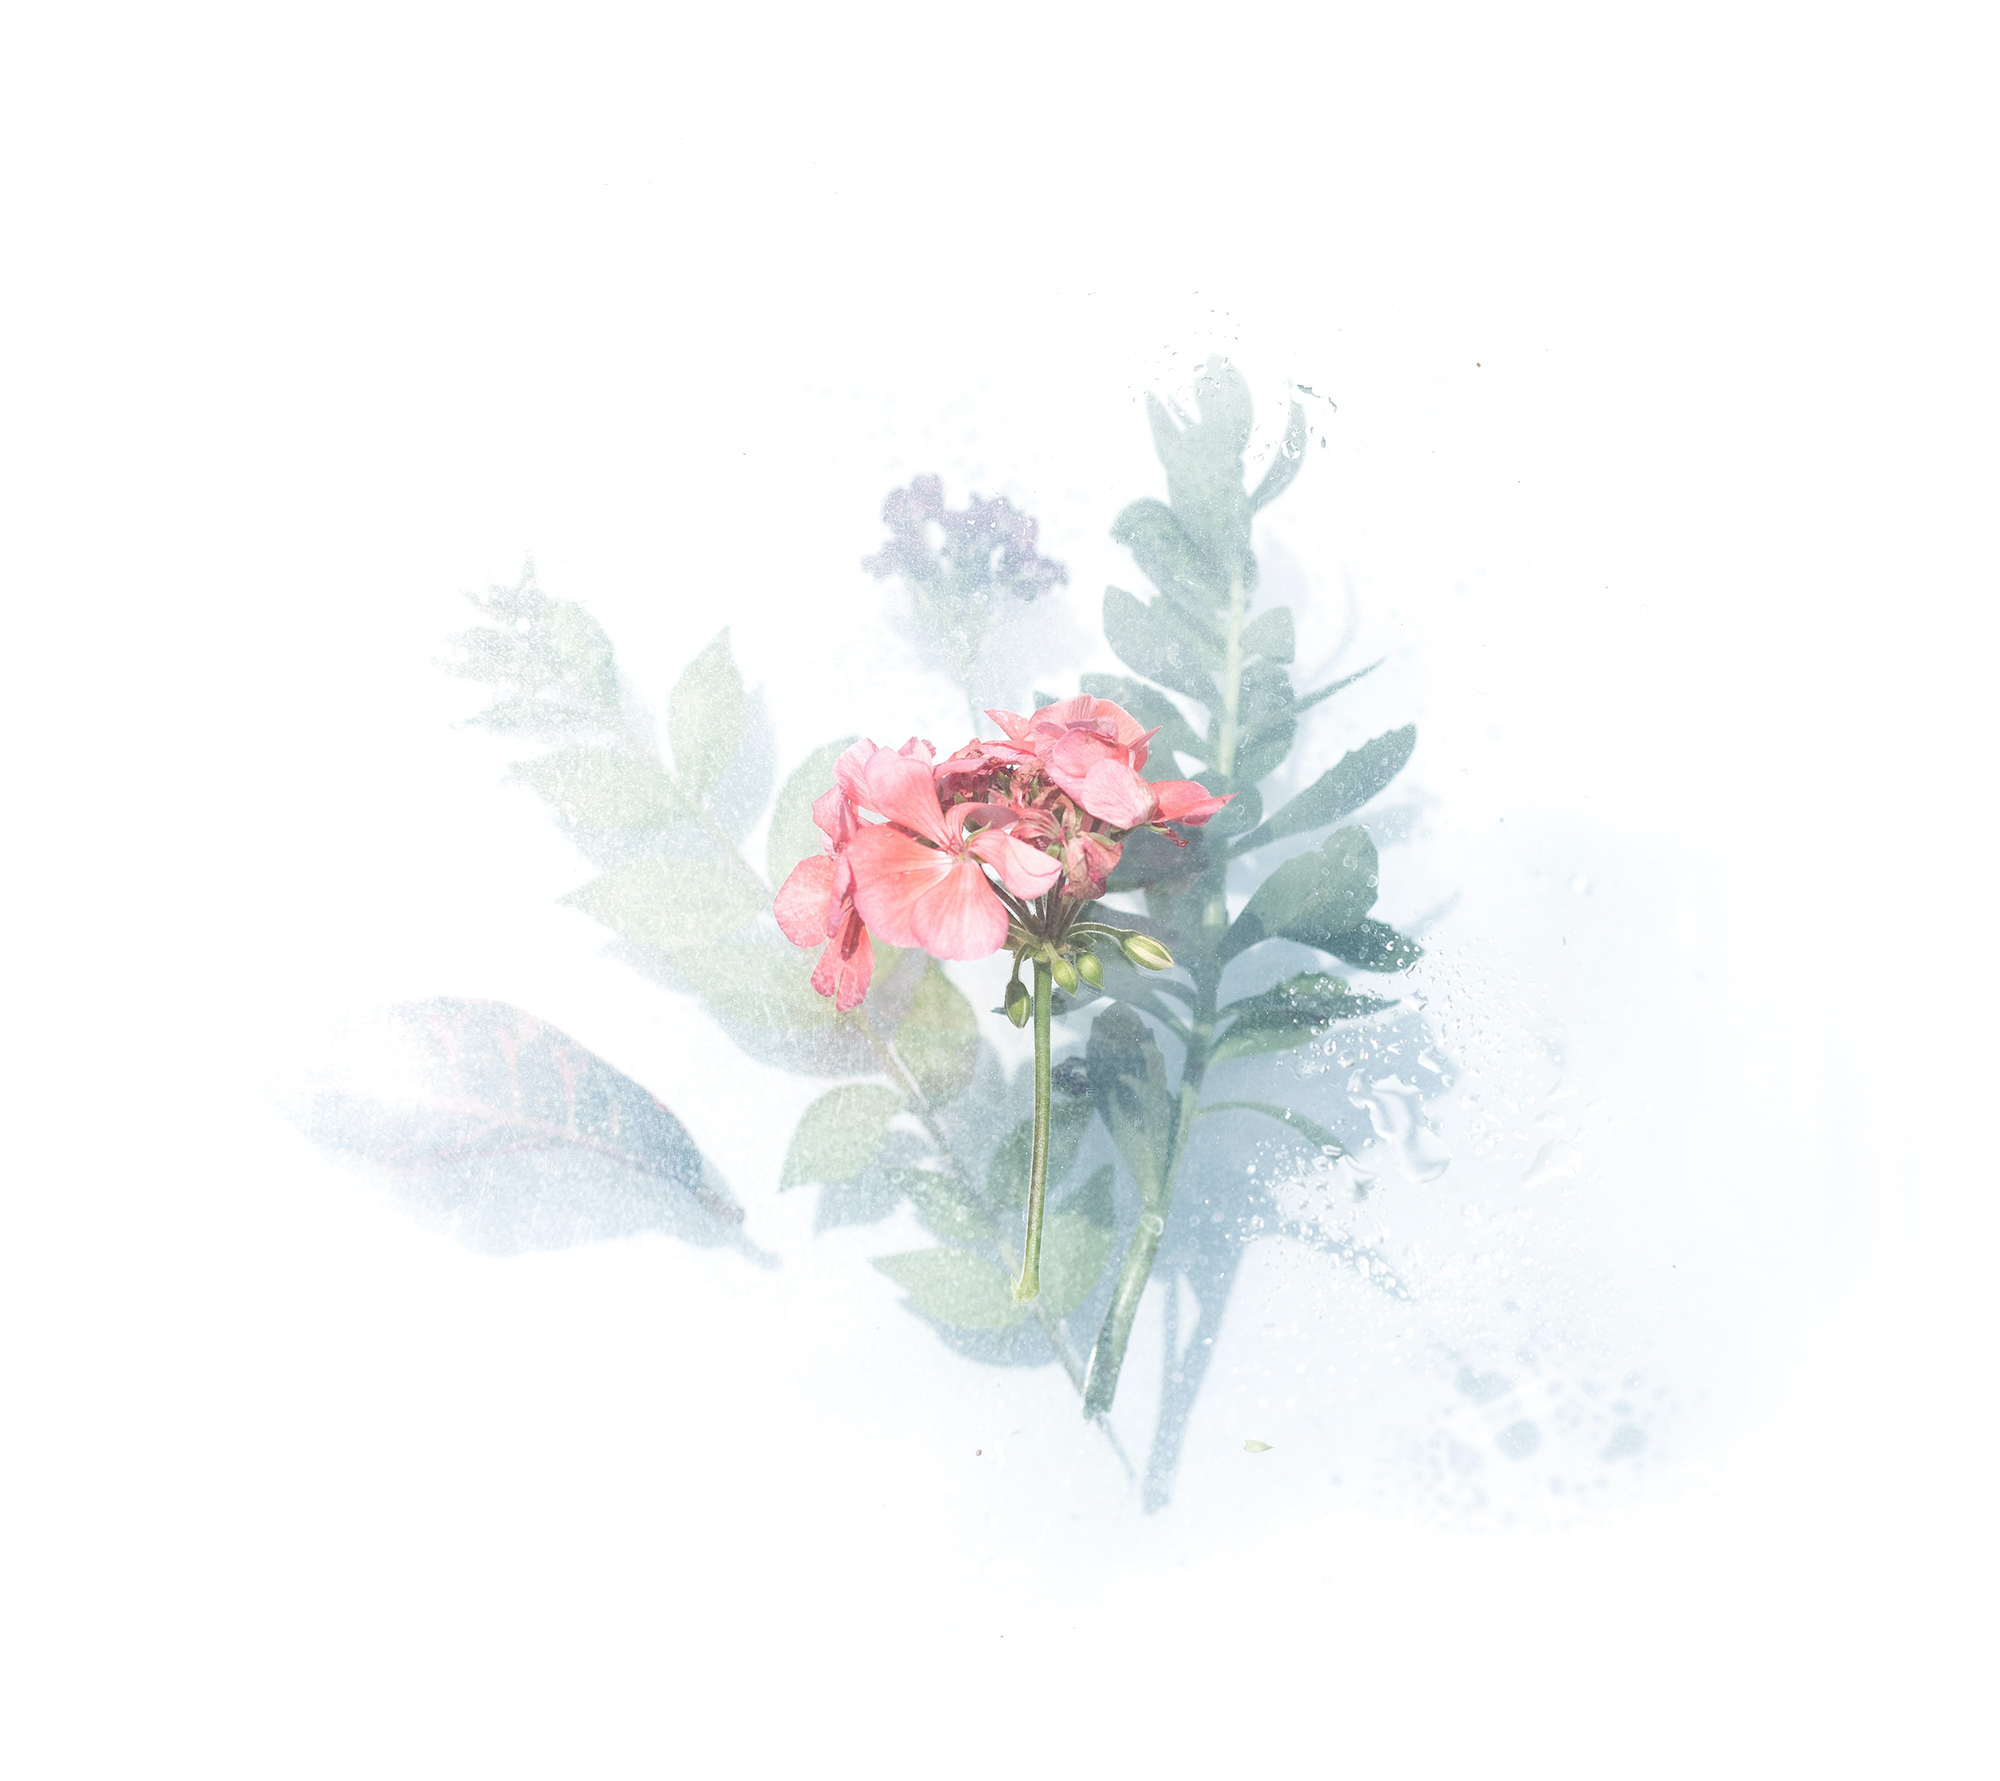
Photograph by Evie S | Bringing flowers indoors can open up new creative possibilities, such as this shot where flowers have been compressed under glass.
In Conclusion
Flower photography is such a popular genre – probably because it can lead to such simple, elegant and beautiful images. This guide will help you get started with flower photography and help you produce gorgeous shots every time. And don’t be afraid to experiment with your own ideas – there are so many wonderful flowers out there to capture!
Self-Help Quiz
- What is the best type of lens for flower photography?
- If you use flash on an image shot at 1:1 magnification, what will happen to the background of your shot?
- What, ideally, is the lowest shutter speed you should shoot flowers with?
- Why are overcast days so good for photographing flowers?
- What is backlighting?
Cover Photo By Photograph by Elisa H